Introduction
In recent years, the culinary world has seen an exciting rise in the popularity of no-bake desserts. These quick and easy treats have become a go-to solution for health-conscious individuals and busy families alike, offering a way to satisfy sweet cravings without the hassle of turning on the oven. Among the many no-bake options available, chocolate oat bars stand out as a particularly appealing choice. Not only do they deliver a rich, chocolaty flavor, but they also pack a nutritious punch, making them an ideal snack or dessert for any occasion.
Imagine biting into a chewy, chocolatey bar that melts in your mouth, all while knowing you’re treating your body to wholesome ingredients. Chocolate oat bars are made with a combination of rolled oats, Medjool dates, and almond butter, each contributing to a delightful balance of taste and nutrition. This recipe not only promises a delicious indulgence but also sets the stage for a healthier approach to snacking. As we delve deeper into the world of no-bake chocolate oat bars, you’ll learn about the health benefits of each ingredient and the simplicity of the preparation process.
Understanding No-Bake Desserts
No-bake desserts are precisely what they sound like: sweet treats that require no baking. These recipes are typically quick to prepare, often taking less than 30 minutes from start to finish, which is a significant advantage for those with busy schedules. The appeal of no-bake desserts extends beyond their convenience; they often require fewer ingredients and less equipment, making them accessible for novice bakers and seasoned chefs alike.
One of the standout features of no-bake recipes is their versatility. They can be easily adapted to fit various dietary needs, such as gluten-free, vegan, or nut-free. This flexibility means you can enjoy a delicious dessert without compromising your dietary restrictions. For instance, with a few simple swaps, you can create a no-bake chocolate oat bar that caters to your specific health preferences, all while keeping the taste intact.
The Allure of Chocolate Oat Bars
Chocolate oat bars are not only irresistibly tasty but also a smart choice for a snack or dessert. Their primary ingredient, rolled oats, is a fantastic source of dietary fiber, which aids digestion and promotes heart health. When combined with the natural sweetness of Medjool dates, these bars provide a guilt-free indulgence that doesn’t compromise on flavor.
The combination of fiber-rich oats and nutrient-dense dates not only helps keep your energy levels stable but also makes these bars a satisfying option for those mid-afternoon cravings. Almond butter adds a creamy texture and a boost of healthy fats and protein, turning these bars into a well-rounded snack that keeps you full longer. Whether you’re looking for a quick treat to enjoy at home, a post-workout snack, or a lunchbox addition for the kids, chocolate oat bars check all the boxes for nutrition and taste.
Ingredients Overview
To create these decadent no-bake chocolate oat bars, you’ll need a handful of wholesome ingredients, each contributing unique health benefits and flavor profiles. Here’s a closer look at what you’ll need:
– Rolled Oats: These oats are a powerhouse of nutrition, rich in complex carbohydrates and dietary fiber. Incorporating rolled oats into your diet can help lower cholesterol levels and improve heart health. They also provide a satisfying chewiness that forms the base of your chocolate oat bars.
– Medjool Dates: Known for their natural sweetness and chewy texture, Medjool dates serve as the perfect sweetener in this recipe. They are packed with essential nutrients, including potassium, magnesium, and vitamin B6, making them a healthful alternative to refined sugars.
– Creamy Almond Butter: This ingredient is a source of healthy fats, protein, and essential vitamins and minerals. Almond butter not only adds creaminess to the bars but also contributes to the overall nutritional profile, making these treats more filling and satisfying.
– Pure Maple Syrup: A natural sweetener, pure maple syrup brings a distinct flavor and trace minerals like manganese and zinc. Its sweetness complements the other ingredients while keeping the bars free from artificial sugars.
– Unsweetened Cocoa Powder: Rich in antioxidants, unsweetened cocoa powder is the star of this recipe. It enhances the chocolate flavor without adding sugar, making it a guilt-free indulgence. Plus, it’s linked to numerous health benefits, including improved heart health and mood enhancement.
– Vanilla Extract: A splash of vanilla extract elevates the flavor of your chocolate oat bars without adding extra sugars. It brings warmth and depth to the overall taste, making each bite irresistibly enjoyable.
– Sea Salt: A pinch of sea salt is essential in balancing the flavors, enhancing the sweetness of the dates and chocolate while adding complexity to the overall taste.
– Dark Chocolate Chips: The finishing touch to these bars, dark chocolate chips not only add a delightful burst of chocolate flavor but also provide an additional dose of antioxidants. Choose a high-quality dark chocolate for the best taste and health benefits.
– Optional Add-Ins (Chopped Nuts, Shredded Coconut): To customize your chocolate oat bars further, consider incorporating chopped nuts or shredded coconut. These add-ins contribute texture and flavor, allowing you to tailor the recipe to your taste preferences.
Step-by-Step Instructions
Now that you have a thorough understanding of the ingredients and their benefits, let’s dive into the step-by-step instructions for creating your decadent no-bake chocolate oat bars.
1. Prepare Your Equipment: Start by gathering all your ingredients and necessary equipment. You will need a mixing bowl, a food processor, and an 8×8-inch baking pan lined with parchment paper for easy removal.
2. Process the Base Ingredients: In a food processor, combine the rolled oats, Medjool dates, almond butter, and pure maple syrup. Process until the mixture is well combined and sticky. You may need to scrape down the sides of the bowl a few times to ensure everything is evenly mixed.
3. Add Cocoa Powder and Vanilla: Once the base is well combined, add the unsweetened cocoa powder and vanilla extract into the mixture. Process again until the cocoa powder is fully incorporated, and the mixture appears uniform in color and texture.
4. Incorporate Sea Salt and Dark Chocolate Chips: After blending in the cocoa powder, add a pinch of sea salt and the dark chocolate chips. Pulse the food processor a few times to fold in the chocolate chips without breaking them apart completely.
5. Transfer to the Baking Pan: Pour the mixture into the prepared baking pan. Using a spatula, press the mixture down firmly and evenly into the pan, ensuring there are no air pockets and the bars will hold together once set.
6. Chill the Bars: Cover the pan with plastic wrap or foil and place it in the refrigerator for at least one hour. This chilling time allows the bars to firm up, making them easier to slice and enjoy later.
7. Slice and Serve: Once the bars have set, remove them from the refrigerator and lift them out of the pan using the parchment paper. Place them on a cutting board and slice them into squares or rectangles, depending on your preferred serving size.
With these straightforward instructions, you can create a batch of delicious no-bake chocolate oat bars that are sure to satisfy your sweet tooth while keeping your health goals in check. Stay tuned for more insights and tips in the next part of this article, where we will explore variations, storage options, and frequently asked questions about these delightful treats.
{{image_2}}
Preparing the Date Paste
To begin crafting your decadent no-bake chocolate oat bars, the first step is preparing the date paste, which serves as the base for the bars. The right consistency is crucial; you want a smooth, thick paste that binds all the ingredients together. Start by pitting the dates and soaking them in warm water for about 10 minutes to soften. This helps to achieve a creamier texture when blended. Once softened, drain the water and place the dates in a food processor. Blend until they form a sticky paste, scraping down the sides as necessary. The final paste should be slightly sticky but spreadable, making it easy to incorporate into the dry ingredients.
Mixing the Dry Ingredients
Next, it’s time to mix the dry ingredients, which include rolled oats, cocoa powder, and a pinch of salt. In a large mixing bowl, combine these dry components thoroughly. This step is essential for ensuring that the flavors are evenly distributed throughout the bars. Use a whisk or a fork to break up any clumps of cocoa powder and to ensure that the oats are well mixed. The salt enhances the flavor of the chocolate and balances the sweetness of the dates and maple syrup.
Blending the Wet Ingredients
While the dry ingredients are coming together, focus on blending the wet ingredients. In a separate bowl, combine the date paste, nut butter (such as almond or peanut butter), and maple syrup. The nut butter acts as a binding agent that adds healthy fats, while the maple syrup contributes natural sweetness and moisture. Mix these ingredients until they are well combined and smooth. This mixture should be thick but pourable, allowing it to blend seamlessly with the dry ingredients.
Combining Mixtures
Once you have your wet and dry mixtures prepared, it’s time to combine them. Pour the wet mixture into the bowl containing the dry ingredients. Using a spatula, gently fold the mixtures together until everything is well incorporated. Take care not to overmix, as this can lead to a denser texture. The goal is to have an evenly combined mixture where the oats are coated in the chocolatey goodness of the wet ingredients. If you find the mixture too dry, you can add a tablespoon of water or additional nut butter to help bind it together.
Pressing into the Baking Dish
Now that your mixture is ready, transfer it to a lined baking dish. A square or rectangular dish works best. Using your hands or a spatula, press the mixture firmly into the bottom of the dish, ensuring that it’s evenly spread out. The compacting is critical for achieving the right texture; a well-pressed mixture will hold its shape when sliced. Aim for a thickness of about 1 to 1.5 inches. Once pressed down, smooth the top with the back of a spatula for a polished finish.
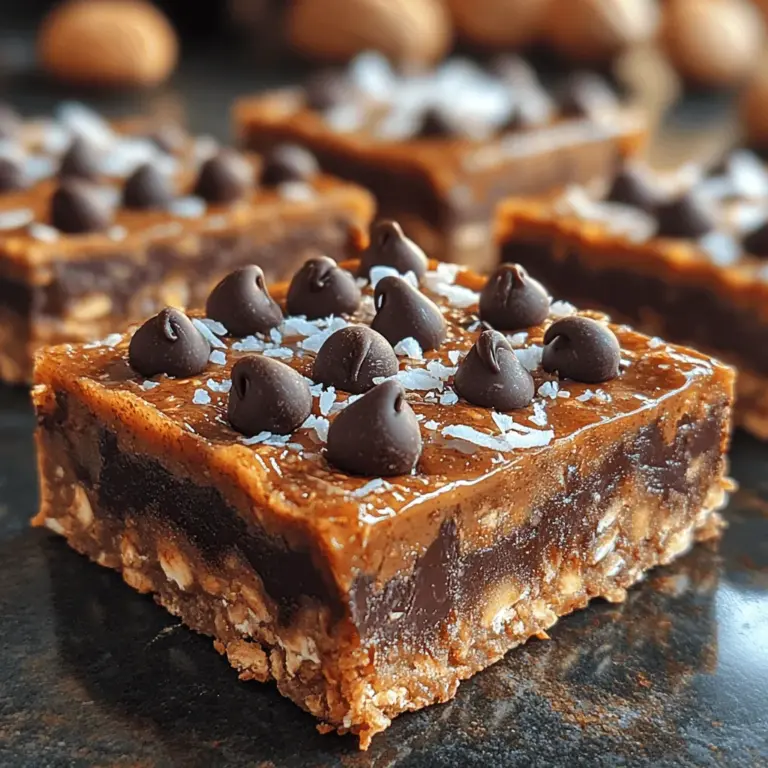
Adding Toppings and Chilling
For an extra touch, consider adding toppings before chilling. Sprinkle some dark chocolate chips, chopped nuts, or shredded coconut on top of the mixture. This not only enhances the visual appeal but also adds layers of flavor and texture. After adding your toppings, cover the baking dish with plastic wrap or foil and place it in the refrigerator. Chilling the bars for at least 2 hours is essential, as it allows the flavors to meld together and the mixture to firm up, making it easier to slice.
Slicing and Serving
Once chilled, remove the bars from the refrigerator. Lift them out of the dish using the parchment paper, and place them on a cutting board. Using a sharp knife, slice the mixture into squares or rectangles, depending on your preferred serving size. For an attractive presentation, consider arranging the bars on a serving platter and drizzling with melted dark chocolate or a sprinkle of sea salt. These no-bake chocolate oat bars make for a delightful snack or dessert that can be enjoyed anytime, whether as a post-workout boost or an afternoon pick-me-up.
Nutritional Analysis
These decadent no-bake chocolate oat bars are not only delicious but also packed with nutritional benefits. Each serving (approximately one bar) contains about 150 calories, with macronutrients broken down as follows:
– Protein: 4g
– Fats: 7g (mostly healthy fats from nut butter)
– Carbohydrates: 20g (with 3g of fiber)
The bars are a good source of dietary fiber, which aids in digestion and helps maintain a feeling of fullness. Additionally, they provide essential vitamins and minerals such as magnesium, potassium, and iron, making them a wholesome choice for a snack. The combination of oats and dates delivers sustained energy, making these bars perfect for fueling your day.
Storage and Shelf Life
To ensure your chocolate oat bars stay fresh and delicious, proper storage is key. Place the sliced bars in an airtight container lined with parchment paper to avoid sticking. These bars can be kept in the refrigerator for up to one week, maintaining their texture and flavor. If you want to extend their shelf life, consider freezing them. Wrap each bar individually in plastic wrap, then store them in a freezer-safe bag. They can last up to three months in the freezer. When you’re ready to enjoy a bar, simply thaw it in the refrigerator overnight or at room temperature for a few hours.
Variations and Customizations
One of the best aspects of these no-bake chocolate oat bars is their versatility. Feel free to customize the recipe to suit your tastes or dietary restrictions. Here are some ideas:
– Nut Butter Substitutions: If you have nut allergies, try sunflower seed butter or tahini for a nut-free option. Cashew butter can also provide a creamy, rich flavor.
– Mix-Ins: Enhance the bars by adding your favorite mix-ins. Dried fruits like cranberries or apricots can introduce a chewy texture, while seeds such as chia or flaxseed can provide additional nutrients.
– Adjusting Sweetness: Tailor the sweetness to your liking by modifying the amount of maple syrup or opting for a sugar-free substitute, such as stevia or monk fruit sweetener.
Conclusion
In summary, making decadent no-bake chocolate oat bars at home is both simple and rewarding. These bars are not just a treat; they are a nourishing snack that can be easily customized to fit various dietary preferences. Whether you’re looking for a quick breakfast on the go, a healthy dessert, or a post-workout snack, these bars deliver on taste and nutrition. Enjoy the process of creating them and relish every bite, knowing that you are indulging without compromising your health. Get creative with your variations, and make this recipe your own—your taste buds will thank you!