Delightful No-Bake Cheesecake Cups
Introduction
In the world of desserts, no-bake options have carved out a niche that is both appealing and practical. These delightful treats offer a perfect solution for those who want to whip up something sweet without the hassle of turning on the oven. One standout option in this category is the No-Bake Cheesecake Cup, a simple, elegant, and utterly delicious dessert that captivates the senses.
The charm of these cheesecake cups lies in their individual servings, making them not only a treat for the palate but also a feast for the eyes. Each cup can be customized with a variety of toppings, allowing for endless creativity and personalization. Whether you prefer the sweetness of fresh berries or the crunch of cookie crumbles, these cheesecake cups are versatile enough to suit every taste.
One of the most appealing aspects of this recipe is its ease of preparation. You don’t need to be a seasoned baker or possess advanced cooking skills to create these delightful treats. With just a handful of ingredients and a few simple steps, you can impress your family and friends with a dessert that looks and tastes like it came from a gourmet kitchen.
The Allure of No-Bake Desserts
The no-bake concept is a game changer in the culinary world. It eliminates the need for baking equipment and reduces the overall time spent in the kitchen. This aspect is particularly beneficial during the hot summer months when the last thing anyone wants is to heat up the house with an oven. No-bake desserts shine at various occasions, whether it’s a summer gathering, a potluck, or a cozy family dinner. They provide a refreshing option that allows you to enjoy a sweet treat without the stress of baking.
Additionally, no-bake recipes often require fewer dishes, making clean-up a breeze. This convenience is a significant draw for busy individuals and families who want to indulge in dessert without the associated labor. With no-bake desserts, you can spend more time enjoying the company of loved ones and less time fussing over complicated recipes.
Ingredients for Delightful No-Bake Cheesecake Cups
Before embarking on your culinary adventure, it’s essential to gather your ingredients. The Delightful No-Bake Cheesecake Cups consist of three main components: the crust, the filling, and the toppings. Each ingredient plays a vital role in creating the perfect balance of flavor and texture.
For the Crust:
1. Graham Cracker Crumbs: The foundation of your cheesecake cups, graham cracker crumbs provide a classic flavor and a delightful crunch. They create a sturdy base that complements the creamy filling.
2. Granulated Sugar: A touch of sweetness is necessary, and granulated sugar helps bind the crust together. This ingredient enhances the overall flavor, making each bite a little more indulgent.
3. Unsalted Butter: Adding richness and moisture, unsalted butter is essential for achieving the right texture in your crust. It helps the crumb mixture hold together while contributing to the buttery flavor that pairs so well with cheesecake.
For the Cheesecake Filling:
1. Cream Cheese: The star ingredient, cream cheese, provides a rich and creamy texture. It forms the base of the filling, ensuring that each spoonful is smooth and satisfying.
2. Powdered Sugar: For sweetness without graininess, powdered sugar is preferred in this recipe. It blends seamlessly into the filling, enhancing the overall taste and smoothness.
3. Vanilla Extract: A splash of vanilla extract adds depth and complexity to the flavor profile of the cheesecake filling. It elevates the dessert, making it taste more sophisticated and homemade.
4. Heavy Whipping Cream: To achieve a light and airy texture, heavy whipping cream is whipped until it forms soft peaks and then folded into the cream cheese mixture. This step is crucial for creating the signature fluffiness of no-bake cheesecakes.
For the Topping:
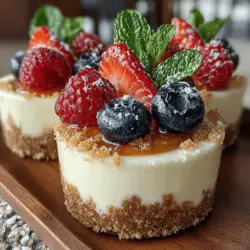
1. Fresh Berries: Topping your cheesecake cups with fresh berries not only adds a burst of flavor but also introduces vibrant colors to the dessert. Strawberries, blueberries, and raspberries are excellent choices that contribute natural sweetness and nutrition.
2. Fresh Mint Leaves: For a touch of elegance, garnish your cheesecake cups with fresh mint leaves. They not only enhance the visual appeal but also add a refreshing note that balances the richness of the filling.
Step-by-Step Instructions for Creating Your Cheesecake Cups
Now that you have all your ingredients ready, it’s time to dive into the preparation process. Creating the crust is the first step, and it sets the stage for the delicious cheesecake filling that will follow.
Preparation of the Crust:
1. Crush the Graham Crackers: Begin by placing your graham crackers in a zip-top bag and using a rolling pin or your hands to crush them into fine crumbs. Alternatively, you can use a food processor for a quicker method. Aim for a texture similar to sand, as this will ensure that your crust holds together nicely.
2. Mix the Ingredients: In a medium mixing bowl, combine the crushed graham crackers with granulated sugar. Stir until the sugar is evenly distributed throughout the crumbs. Next, melt the unsalted butter in a small microwave-safe bowl or on the stovetop until fully liquefied. Pour the melted butter into the bowl with the graham cracker mixture and stir until all the crumbs are well coated and the mixture resembles wet sand.
3. Form the Crust: Take your prepared mixture and evenly distribute it into the bottom of small cups or jars. Use the back of a spoon or your fingers to press the crumbs down firmly, creating an even layer. Ensure that the crust is packed tightly to prevent it from crumbling when serving.
4. Chill the Crust: Once your crusts are formed, place the cups in the refrigerator for at least 10-15 minutes. This chilling step helps the crust firm up, making it easier to add the cheesecake filling later on.
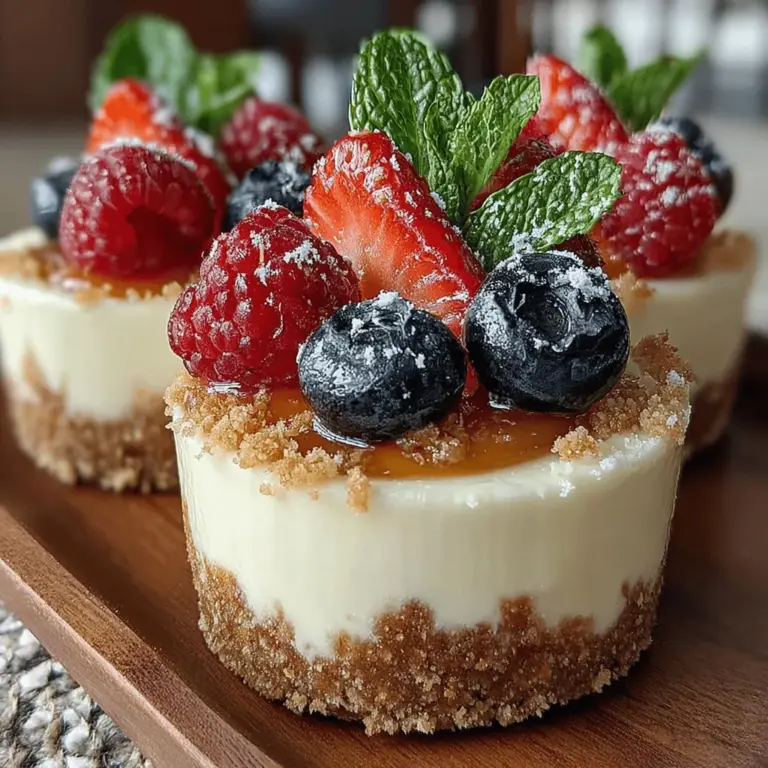
As the crust chills, you can prepare the cheesecake filling, which will be the next step in creating your Delightful No-Bake Cheesecake Cups. Stay tuned for the following sections where we’ll explore the filling process and how to top off your delightful creations!
{{image_2}}
Combining Ingredients and Achieving the Right Texture
Creating the perfect no-bake cheesecake cups begins with the right combination of ingredients. To achieve a smooth, creamy texture, it’s essential to mix your ingredients thoroughly. Start by combining the softened cream cheese with the sugar in a large mixing bowl. Using a hand mixer or stand mixer, beat until the mixture is velvety and free of lumps. This step is crucial, as lumps can affect the final texture of your cheesecake.
Next, gradually add in the sour cream and vanilla extract, continuing to mix until fully incorporated. The sour cream not only adds a tangy flavor but also contributes to the creaminess of the filling. Once this mixture is smooth, it’s time to fold in the whipped cream. This step is vital for achieving the light, airy texture that no-bake cheesecakes are known for.
Tips on Pressing the Crust for Optimal Firmness
To ensure your crust holds together well, it’s important to pack it firmly into the bottom of your serving cups. Use a flat-bottomed measuring cup or a small glass to press the crumb mixture into the cups. Start by adding about one to two tablespoons of the crust mixture into each cup, then firmly press it down to create a solid base. The goal is to create a crust that’s not too thick but substantial enough to hold the filling without crumbling.
After pressing the crust, consider chilling the cups for about 10-15 minutes before adding the cheesecake filling. Chilling helps the butter in the crust set slightly, making it easier to maintain its shape when you add the filling.
Crafting the Cheesecake Filling
Importance of Softening Cream Cheese for Easy Mixing
Softening the cream cheese is a critical step in making your cheesecake filling. Ideally, remove the cream cheese from the refrigerator about 30 minutes before you begin. This allows it to come to room temperature, making it much easier to mix and preventing lumps. If you’re short on time, you can cut the cream cheese into smaller pieces and microwave it for about 10-15 seconds, but be cautious to avoid melting it.
Techniques for Incorporating the Whipped Cream Without Deflating
When it comes to folding in the whipped cream, the technique is key to maintaining the airy texture of the cheesecake. First, ensure your heavy cream is whipped to stiff peaks, which means it should hold its shape when you lift the whisk. Using a spatula, gently fold in the whipped cream to the cream cheese mixture. Be careful not to overmix; instead, use a gentle up-and-over motion. This technique helps to retain the lightness of the whipped cream, resulting in a fluffy, delicious cheesecake filling.
Filling the Cups
Best Practices for Achieving Consistent Filling Levels
When it’s time to fill your cups, uniformity is important for presentation and serving. Use a small ice cream scoop or a spoon to add the cheesecake filling to each cup. Aim for a consistent amount in each cup, about two to three tablespoons, to ensure they all look equally appealing.
Suggestions for Using Piping Bags for a Neat Presentation
For a more polished look, consider transferring the cheesecake filling into a piping bag. This allows for easy and precise filling, creating a beautiful layered effect. Simply cut the tip of the piping bag and squeeze the filling into each cup, starting from the bottom and working your way to the top. This method not only enhances the appearance but also makes it easier to control how much filling you use.
Chill and Set
Chilling is a crucial step in the no-bake cheesecake process. After filling your cups, cover them with plastic wrap or lids and place them in the refrigerator for at least 4 hours, or overnight if possible. This chilling time allows the cheesecake to set properly, ensuring that it holds its shape when served. Additionally, chilling develops the flavors, making each bite a delightful experience.
Serving Suggestions for No-Bake Cheesecake Cups
Importance of Presentation for Enhancing the Dessert Experience
Presentation can elevate your no-bake cheesecake cups from simple to stunning. Consider serving them in clear glass cups or jars, which showcase the beautiful layers of crust and filling. A well-presented dessert not only pleases the eye but also enhances the overall dining experience.
Ideas for Creating an Attractive Display Using Garnishes and Plating
Garnishing your cheesecake cups can add color and flavor. Top each cup with a dollop of whipped cream, a sprinkle of crushed graham crackers, or a few fresh berries. For an extra touch of elegance, drizzle some chocolate or caramel sauce over the top. You can even add mint leaves for a fresh contrast. Arrange the cups on a decorative platter with some additional garnishes to create an attractive display for your guests.
Suggestions on Pairing with Beverages or Additional Dessert Items
Pair your no-bake cheesecake cups with a refreshing beverage to enhance the dessert experience. A glass of iced tea, sparkling water, or a light fruit-infused drink can complement the richness of the cheesecake. Alternatively, consider serving them alongside a scoop of vanilla ice cream or a small selection of cookies for a delightful dessert spread.
Customization Options for Your Cheesecake Cups
Discuss Various Toppings Beyond Fresh Berries
While fresh berries are a classic topping, there are many other delicious options to elevate your cheesecake cups. Consider adding chocolate shavings, a drizzle of caramel or chocolate sauce, or crushed nuts for added texture and flavor. These toppings not only enhance the taste but also add visual appeal.
Seasonal Fruit Variations to Keep the Dessert Fresh Year-Round
To keep your cheesecake cups exciting throughout the year, experiment with seasonal fruits. In the spring and summer, try topping them with sliced peaches or strawberries. In the fall, consider using spiced apple compote or pear slices. In winter, pomegranate seeds or citrus slices can add a festive touch. This versatility ensures your dessert remains fresh and appealing with every season.
Flavor Variations for the Cheesecake Filling
Don’t hesitate to get creative with the cheesecake filling itself. For a citrus twist, add lemon or lime zest to the cream cheese mixture. If you’re a chocolate lover, fold in melted chocolate or cocoa powder for a rich chocolate cheesecake. For a fun variation, experiment with flavored extracts like almond or peppermint to create unique flavor profiles that reflect your personal taste.
Nutritional Considerations
Brief Overview of the Nutritional Aspects of the Cheesecake Cups
While no-bake cheesecake cups are a delightful treat, it’s beneficial to consider their nutritional aspects. A typical serving provides a balance of carbohydrates, fats, and proteins, making it a satisfying dessert. However, it’s essential to be mindful of portion sizes, as the richness can make it easy to indulge.
Discussion on Portion Control and the Balance of Indulgence and Health
These cheesecake cups are perfect for portion control, allowing you to enjoy a sweet treat without overindulging. By serving them in smaller cups, you can satisfy your sweet tooth while maintaining a balanced diet. Remember, moderation is key, and it’s perfectly okay to indulge every now and then.
Mention of Potential Ingredient Substitutions for Dietary Restrictions
For those with dietary restrictions, there are several ingredient substitutions you can make. To create a gluten-free version, simply use gluten-free graham cracker crumbs for the crust. For a lighter option, consider using reduced-fat cream cheese or Greek yogurt in place of sour cream. Additionally, there are dairy-free cream cheese alternatives available for those following a vegan diet.
Conclusion
No-bake cheesecake cups are a delightful and easy dessert that can impress your guests while also being a treat you can enjoy at home. With simple ingredients and minimal effort, you can create a dessert that is both delicious and visually appealing. Whether for a special gathering or just a sweet treat for yourself, these cheesecake cups are sure to satisfy.
Encourage your family and friends to join you in making this dessert, as sharing homemade treats fosters connection and joy. The experience of preparing and enjoying these cheesecake cups together can create lasting memories. So gather your ingredients, unleash your creativity, and dive into the delightful world of no-bake cheesecake cups!