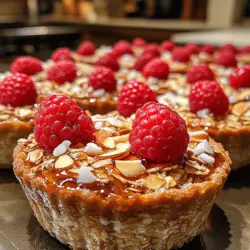
Guilt-Free Raspberry Oat Cups: A Deliciously Healthy Treat
Introduction
In the quest for healthier snacking options, the Guilt-Free Raspberry Oat Cups stand out as a delightful and nutritious choice. These wholesome oat cups are not just a treat for the taste buds but also a powerhouse of nutrients, making them perfect for breakfast on the go or a satisfying snack to curb those midday cravings. With a simple mix of rolled oats, fresh raspberries, and natural sweeteners, these cups embody the essence of guilt-free indulgence. This article will take you through the recipe, highlighting its health benefits, and offering creative serving suggestions to inspire your culinary journey.
Understanding the Ingredients
Before diving into the preparation of these delicious oat cups, it is essential to understand the ingredients that contribute to their wholesome nature:
– Rolled Oats: The backbone of this recipe, rolled oats are celebrated for their high fiber content, which aids digestion and provides sustained energy. They are also rich in essential vitamins and minerals, making them an ideal base for any healthy treat.
– Unsweetened Applesauce: This ingredient serves as a fantastic substitute for oil or butter, adding moisture without the extra calories or unhealthy fats. Applesauce not only enhances the texture of the oat cups but also infuses a subtle sweetness that complements the other flavors.
– Almond Milk: A popular dairy-free alternative, almond milk adds a creamy texture and contributes to the lightness of the recipe. It pairs well with the oats and raspberries while keeping the overall calorie count low.
– Maple Syrup: Unlike refined sugars, maple syrup is a natural sweetener with a lower glycemic index, making it a healthier choice for those seeking to manage their sugar intake. It adds a rich flavor that beautifully complements the tartness of the raspberries.
– Fresh Raspberries: The star of the dish, fresh raspberries are not only delicious but also brimming with antioxidants and vitamins. Their natural tartness provides a refreshing contrast to the sweetness of the other ingredients, making every bite a burst of flavor.
– Baking Powder and Salt: These two ingredients are vital for achieving the right texture and flavor balance in the oat cups. Baking powder helps them rise, while a pinch of salt enhances the overall taste.
– Ground Cinnamon: Known for its warm flavor, ground cinnamon also comes with potential health benefits, including anti-inflammatory properties. It adds depth to the flavor profile of the oat cups, making them even more enjoyable.
Step-by-Step Recipe Instructions
Prepping Your Kitchen: Preheat the Oven and Prepare the Muffin Tin
To kick off the preparation of your Guilt-Free Raspberry Oat Cups, the first step is to preheat your oven to 350°F (175°C). Preheating is crucial as it ensures that the oat cups bake evenly, resulting in a perfectly cooked treat. While the oven is heating, take a moment to prepare your muffin tin. Grease it lightly with cooking spray or line it with muffin liners to prevent sticking. Proper preparation of your baking vessel is key to achieving optimal results and makes for easy cleanup.
Mixing Dry Ingredients: Creating the Oat Base
Next, gather your dry ingredients—rolled oats, baking powder, salt, and ground cinnamon. In a large mixing bowl, combine these ingredients thoroughly. Mixing the dry ingredients evenly is essential for ensuring that the flavors are distributed uniformly throughout the oat cups. This step not only contributes to the overall taste but also helps achieve a consistent texture. Stir the mixture well until all the ingredients are well incorporated, and set it aside.
Combining Wet Ingredients: Achieving the Perfect Blend
Now it’s time to focus on the wet ingredients. In a separate bowl, combine the unsweetened applesauce, almond milk, and maple syrup. Whisk these together until you achieve a smooth and homogenous mixture. This step is vital, as the wet ingredients bring moisture and sweetness to the oat cups. The applesauce serves as the binding agent, while the almond milk ensures that the mixture is not too dry. Whisking thoroughly helps to break up any lumps, resulting in a smooth batter that will yield light and fluffy oat cups.
Bringing It All Together: Incorporating Raspberries
Once your wet ingredients are well combined, it’s time to bring everything together. Gradually pour the wet mixture into the bowl of dry ingredients, stirring gently until just combined. Be careful not to over-mix, as this can lead to dense oat cups. The final touch is to fold in the fresh raspberries. Gently incorporate them into the mixture, allowing the berries to distribute evenly without breaking apart too much. This will ensure that every bite of your Guilt-Free Raspberry Oat Cups is filled with bursts of juicy raspberry goodness.
By following these initial steps, you’ll be well on your way to creating a batch of deliciously healthy Guilt-Free Raspberry Oat Cups. The combination of wholesome ingredients not only ensures that these treats are nutritious but also makes them a satisfying option for any time of day. Stay tuned as we continue with the remaining steps in the recipe and explore serving suggestions that will elevate your experience with these delightful oat cups.
{{image_2}}
Folding in Raspberries for Maximum Flavor
When it comes to incorporating raspberries into your oat cups, a gentle touch is crucial. Fresh raspberries are delicate and can easily become mushy if handled too roughly. To maintain their shape and ensure that each bite bursts with flavor, follow these steps:
1. Prepare the Raspberries: Start by rinsing the raspberries under cold water and gently patting them dry with a paper towel. This step helps remove any residual dirt without damaging the berries.
2. Folding Technique: After you’ve mixed your oat mixture, take a clean spatula and gently fold the raspberries into the batter. Use a lifting motion rather than stirring vigorously. This way, you preserve the integrity of the raspberries while evenly distributing their sweetness throughout the mixture.
3. Visual Check: The aim is to see whole raspberries throughout the mixture, which not only looks appealing but also enhances the overall flavor profile of the oat cups.
Filling the Muffin Tin: Portion Control and Baking Prep
Portioning out your oat cup mixture is essential for achieving consistent sizes and ensuring even baking. Here are some effective methods:
1. Use a Measuring Cup: A standard 1/4 cup measuring cup works perfectly for portioning out your oat mixture. Scoop the mixture into the muffin tin, filling each cup to about three-quarters full.
2. Ice Cream Scoop: For a more uniform look, consider using an ice cream scoop. This tool allows you to easily transfer the mixture into the muffin tin without the mess.
3. Silicone Muffin Liners: If you’re looking for easy cleanup and a non-stick option, silicone muffin liners are an excellent choice. They provide a perfect shape and make it easier to remove the oat cups after baking.
4. Prepping the Tin: If you’re using a metal muffin tin, lightly grease it with cooking spray or a bit of coconut oil to prevent sticking. If using paper liners, there’s no need for additional grease.
Baking Process: Timing and Temperature
Baking your raspberry oat cups correctly is key to achieving that perfect texture. Follow these guidelines for optimal results:
1. Oven Temperature: Preheat your oven to 350°F (175°C). This moderate temperature helps the cups bake evenly without drying out.
2. Baking Time: Bake your oat cups for 18-20 minutes. Start checking around the 18-minute mark. The oat cups should be golden brown on top, and a toothpick inserted into the center should come out clean or with a few moist crumbs.
3. Visual Cues: Look for a slight puffing of the tops and even browning. If they still appear wet or undercooked, give them an additional couple of minutes, but keep an eye on them to avoid overbaking.
Cooling and Serving: The Final Touch
Once your oat cups are baked to perfection, it’s time to cool and serve them:
1. Cooling: Allow the oat cups to cool in the muffin tin for about 10 minutes. This step helps them set and makes them easier to remove. Afterward, transfer them to a wire rack to cool completely. This prevents them from becoming soggy.
2. Serving Suggestions: For an inviting presentation, consider serving your raspberry oat cups on a decorative platter. You can garnish them with a sprinkle of fresh raspberries or mint leaves for color.
3. Pairing Options: These oat cups pair wonderfully with a dollop of Greek yogurt or a drizzle of honey on top. For an added crunch, sprinkle some granola or crushed nuts.
Health Benefits of Raspberry Oat Cups
Nutritional Profile
Each serving of these guilt-free raspberry oat cups is packed with nutrients. Here’s a quick breakdown of what you’ll find in each cup:
– Calories: Approximately 120 calories per cup
– Macronutrients: 4g protein, 5g fat, 18g carbohydrates
– Vitamins: A good source of Vitamin C from raspberries and fiber from oats, which supports digestive health.
Dietary Considerations
These oat cups are incredibly versatile:
– Gluten-Free Options: Substitute traditional oats with certified gluten-free oats to make this recipe suitable for those with gluten intolerance.
– Vegan Substitutions: Replace the egg with a flaxseed egg (1 tablespoon ground flaxseed mixed with 2.5 tablespoons of water) or applesauce to create a vegan-friendly version.
Energy Boost
The combination of oats and raspberries provides sustained energy levels. Oats are a source of complex carbohydrates, offering a slow release of energy that keeps you feeling full longer. The natural sugars from raspberries give an added boost while providing essential vitamins and antioxidants.
Creative Serving Suggestions
Presentation Ideas
Elevating the visual appeal of your oat cups can make a significant difference in how they are perceived:
1. Layered Display: Arrange the oat cups in a tiered serving tray for an elegant look, perfect for brunch gatherings or special occasions.
2. Colorful Garnishes: Use vibrant fruits like blueberries or sliced strawberries around the oat cups for a pop of color.
Topping Variations
Experiment with various toppings to enhance flavor and texture:
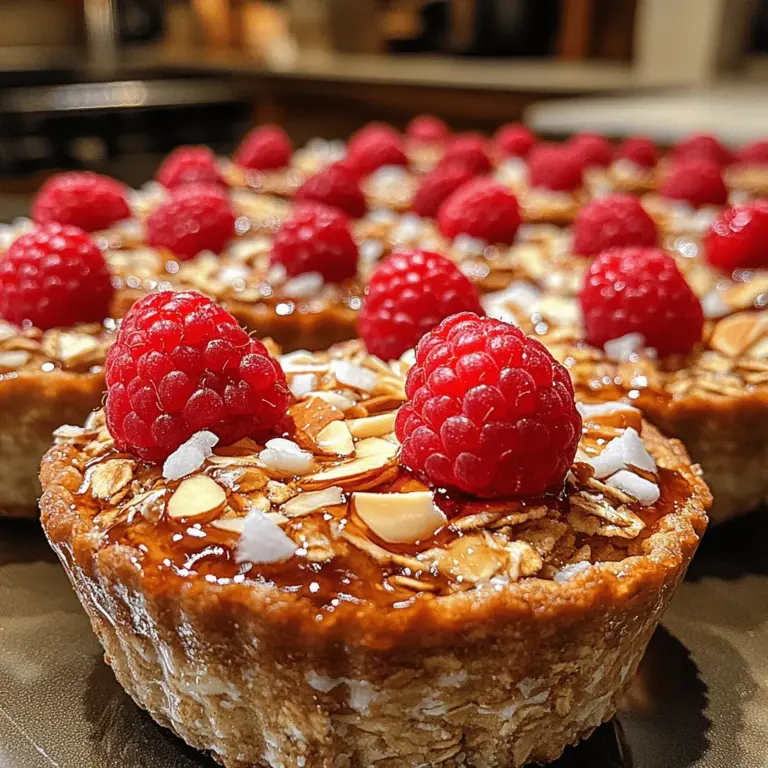
1. Sliced Almonds: Sprinkle sliced almonds on top for a nutty crunch that pairs beautifully with the soft oat texture.
2. Coconut Flakes: Toasted coconut flakes can add a delicious tropical flair to your oat cups.
3. Yogurt: A spoonful of yogurt not only adds creaminess but also provides additional protein.
Storing and Reheating Tips
Storage Solutions
To keep your raspberry oat cups fresh throughout the week:
1. Airtight Containers: Store the cooled oat cups in an airtight container in the refrigerator. They can last up to a week.
2. Freezing Options: For longer storage, freeze the oat cups. Place them in a single layer on a baking sheet to freeze solid, then transfer them to a freezer-safe bag. They will last up to three months.
Reheating Methods
Enjoy your oat cups warm for the best flavor:
1. Microwave: Heat one cup at a time in the microwave for 20-30 seconds until warmed through.
2. Oven: If reheating multiple cups, place them on a baking sheet and cover with foil. Bake at 350°F (175°C) for about 10 minutes.
Conclusion
The Guilt-Free Raspberry Oat Cups are not just a recipe; they represent a lifestyle choice that prioritizes health without sacrificing taste. These versatile oat cups can seamlessly fit into your daily routine, whether as a breakfast option on-the-go or a quick snack during the day. With their simple ingredients and easy preparation, they empower anyone to create a nourishing treat that satisfies both hunger and health goals. Enjoy your guilt-free indulgence with the knowledge that you are nourishing your body with every bite.


