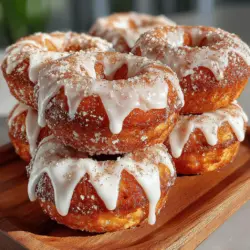
Mini Pumpkin Donuts with Cream Cheese Glaze: A Delightful Fall Treat
As the leaves begin to change and the crispness of autumn fills the air, pumpkin-flavored treats take center stage. From lattes to pies, the warm, comforting flavor of pumpkin has become synonymous with the fall season. Among the myriad of pumpkin-inspired delights, mini pumpkin donuts stand out as a delightful and fun dessert option. These bite-sized treats not only capture the essence of fall but also provide the perfect balance of flavors, combining the warmth of spices with the rich creaminess of a luscious cream cheese glaze.
Imagine indulging in a soft, moist donut that bursts with the flavors of cinnamon, nutmeg, and ginger, all topped with a velvety glaze that brings it all together. This easy recipe for mini pumpkin donuts is not just a seasonal favorite; it’s a treat that you can whip up in your own kitchen, delighting family and friends with its homemade charm.
In this guide, we will take you through the essential steps of creating your very own mini pumpkin donuts with cream cheese glaze, ensuring that your fall baking experience is both enjoyable and rewarding.
Understanding the Ingredients
Before diving into the baking process, it’s essential to familiarize yourself with the key ingredients that make these mini pumpkin donuts so special. Each component plays a crucial role in achieving the perfect texture and flavor profile.
Pumpkin Puree: The star of this recipe is undoubtedly the pumpkin puree. Not only does it impart a lovely orange hue to the donuts, but it also contributes to their moistness and depth of flavor. When selecting pumpkin puree, it’s best to opt for 100% pure pumpkin, avoiding pumpkin pie filling, which contains added sugars and spices that might throw off the balance of your recipe.
Spices: The classic pumpkin spice profile is achieved through a delightful combination of cinnamon, nutmeg, and ginger. Cinnamon adds warmth and sweetness, nutmeg introduces a slightly nutty and earthy flavor, while ginger provides a hint of spice that complements the pumpkin beautifully. Together, these spices evoke the cozy feeling of a fall breeze and the smell of autumn leaves.
Flours and Sugars: For the best texture, a blend of all-purpose flour and perhaps a hint of whole wheat flour can be used. This combination will ensure that your donuts are tender yet sturdy enough to hold up to the glaze. When it comes to sweetness, granulated sugar is typically used, but you can also experiment with brown sugar for a deeper, more caramel-like flavor.
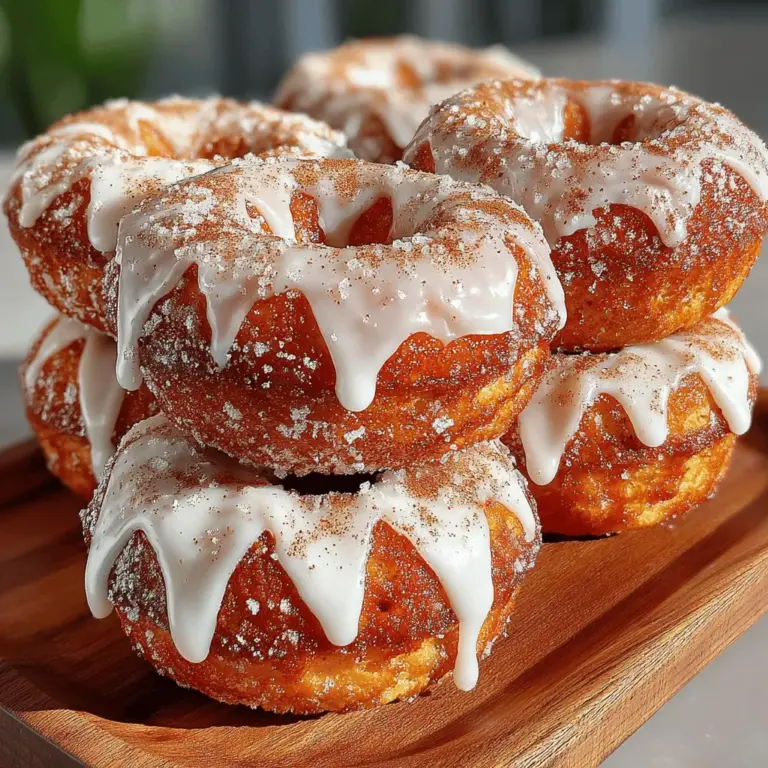
Cream Cheese Glaze: No donut is complete without a delicious glaze, and this cream cheese glaze is the perfect finishing touch. Made with cream cheese, powdered sugar, and a splash of vanilla extract, this glaze is both creamy and sweet, adding a contrasting texture that perfectly complements the spiced pumpkin donuts.
Step-by-Step Guide to Making Mini Pumpkin Donuts
Now that you understand the ingredients, let’s prepare your kitchen for this delightful baking adventure.
Preparing the Kitchen for Baking
Before you begin mixing and measuring, it’s important to set the stage for a successful baking experience. Start by preheating your oven to 350°F (175°C). This temperature is ideal for baking mini donuts, ensuring they cook through evenly without becoming too dry.
While the oven is heating, take a moment to grease your mini donut pan. You can use a non-stick cooking spray or brush the pan with melted butter to ensure that your donuts release easily once baked. A well-prepared pan is key to achieving that perfect, golden-brown finish.
Mixing the Dry Ingredients
Once your kitchen is prepped, it’s time to focus on the dry ingredients. In a large mixing bowl, sift together your all-purpose flour, baking powder, baking soda, and spices. Sifting helps to aerate the flour, ensuring a lighter texture in your donuts.
As you mix, pay special attention to distributing the baking powder and spices evenly throughout the flour. This step is crucial because it ensures that every bite of your mini pumpkin donuts is infused with the same delightful flavor. A whisk can be particularly useful for this task, as it helps break up any clumps and encourages an even mixture.
Creating the Wet Mixture
With the dry ingredients ready, it’s time to move on to the wet mixture. In a separate bowl, combine your pumpkin puree, granulated sugar, and any additional wet ingredients such as eggs and melted butter. Mixing these ingredients separately allows for better emulsification, ensuring that your batter is smooth and cohesive.
One important tip to remember when preparing the wet ingredients is to use room-temperature components. This practice helps blend the ingredients more effectively, resulting in a batter that rises beautifully in the oven. If your ingredients are cold, it can lead to a lumpy batter and uneven baking.
As you blend your wet mixture, keep an eye out for any lumps, especially from the pumpkin puree. A smooth batter is essential for achieving those perfect mini donuts. Once your wet ingredients are well-combined, you can gently fold them into the dry mixture, creating a batter that is both flavorful and inviting.
Stay tuned for the next part of this delightful recipe, where we’ll explore the baking process and how to prepare the creamy glaze that will elevate your mini pumpkin donuts to a new level of indulgence.
{{image_2}}
Combining Dry and Wet Mixtures
Once you have prepared your wet and dry mixtures, it’s time to combine them to create the batter for your mini pumpkin donuts. Begin by making a well in the center of the dry ingredients, which will help incorporate the wet mixture more effectively. Gently pour the pumpkin mixture into the well, taking care not to splash any of the dry ingredients outside the bowl.
Technique for Gently Folding Ingredients to Maintain a Light Texture
When mixing the wet and dry components, the key is to fold rather than stir. Use a spatula or a wooden spoon and gently mix the ingredients in a circular motion, lifting the batter from the bottom of the bowl and folding it over the top. This technique helps maintain the light and airy texture that is crucial for fluffy donuts.
The Science Behind Avoiding Overmixing to Ensure Fluffy Donuts
Overmixing can lead to gluten development, which results in denser, chewier donuts rather than the soft, fluffy texture you want. Stop mixing as soon as you can no longer see any dry flour. A few lumps are perfectly fine; they will bake out during the cooking process. This technique ensures that your mini pumpkin donuts come out light and tender.
Filling the Donut Pan
Now that your batter is well combined, it’s time to fill your donut pan.
Best Practices for Transferring Batter Without Mess
To keep the process neat, consider using a piping bag or a zip-top bag with one corner snipped off to transfer the batter into the donut pan. This method allows for greater control and minimizes mess. If you prefer, you can also use a spoon, but be prepared for a bit of cleanup afterward.
Explanation of the Optimal Filling Level for Effective Rising During Baking
Fill each donut cavity about two-thirds full. This filling level allows enough room for the donuts to rise without overflowing. If you overfill, you may end up with misshapen donuts that don’t have the desired look or texture.
Baking the Donuts
With the pan filled, it’s time to bake your mini pumpkin donuts.
Time and Temperature Guidelines for Perfect Baking
Preheat your oven to 350°F (175°C). Bake your mini donuts for about 10-12 minutes, rotating the pan halfway through to ensure even baking. Baking at the right temperature is crucial for achieving a perfect rise and a golden-brown color.
Visual Cues for Knowing When the Donuts Are Done
You’ll know your donuts are ready when they spring back lightly when touched and have a golden hue. Another effective way to check for doneness is to insert a toothpick into the center of one of the donuts; it should come out clean or with a few moist crumbs clinging to it.
Preparing the Cream Cheese Glaze
While the donuts are baking, you can prepare the cream cheese glaze.
Step-by-Step Instructions on Achieving the Right Consistency for the Glaze
In a medium bowl, beat 4 ounces of softened cream cheese until smooth. Gradually add 1 cup of powdered sugar, mixing well to avoid lumps. Then, add 2 tablespoons of milk and 1 teaspoon of vanilla extract. Stir until the mixture is creamy and smooth. If your glaze is too thick, add a little more milk, one teaspoon at a time, until you reach your desired consistency.
Tips for Adjusting the Glaze Thickness Based on Personal Preference
If you prefer a thicker glaze that can be spread onto the donuts, reduce the amount of milk you add. For a thinner glaze that drizzles easily, add more milk. It’s all about finding the balance that suits your taste!
Glazing and Serving the Donuts
Once your donuts are baked and cooled slightly, it’s time to glaze them.
Techniques for Dipping or Drizzling the Glaze
You can either dip the tops of the donuts into the glaze or drizzle it over the top using a spoon or a piping bag. If you choose the dipping method, make sure the donuts are still slightly warm, as this will help the glaze adhere better. For a decorative touch, consider sprinkling some cinnamon or chopped nuts on top right after glazing.
Presentation Ideas for Serving the Mini Donuts
To present your mini pumpkin donuts beautifully, arrange them on a decorative platter or tiered stand. You can also place them in individual cupcake liners for a fun touch at gatherings. A dusting of powdered sugar or a sprinkle of pumpkin spice can add an extra flair to your presentation.
Storage and Enjoyment
If you happen to have any leftover donuts, proper storage is key to maintaining their freshness.
Best Practices for Storing Leftover Donuts to Maintain Freshness
Store your mini pumpkin donuts in an airtight container at room temperature for up to 3 days. If you want to keep them longer, consider refrigerating them, although this may slightly alter their texture. To enjoy them at their best, you can warm them up in the microwave for a few seconds before serving.
Discussion of How These Mini Donuts Can Be Enjoyed Fresh or Over the Next Couple of Days
These mini donuts are delightful when enjoyed fresh out of the oven, but they also hold up well for a couple of days. Their flavor develops beautifully over time, making them a great treat for breakfast or a snack.
Ideas for Pairing the Donuts with Beverages, Like Coffee or Tea, for a Delightful Treat
Pair your mini pumpkin donuts with a steaming cup of coffee or tea for a cozy experience. The flavors of pumpkin spice and cream cheese glaze complement warm beverages perfectly, creating a delightful treat any time of day.
Conclusion
Making mini pumpkin donuts with cream cheese glaze at home is a joyful and rewarding experience. The aromatic spices, rich pumpkin flavor, and creamy glaze create a perfect balance that appeals to both the palate and the senses. These donuts not only bring a festive touch to your kitchen but also make for a wonderful treat to share with family and friends.
As the fall season approaches, there’s no better time to embrace these cozy delights. Whether for a gathering or simply a quiet afternoon at home, this recipe is sure to bring warmth and happiness. So grab your ingredients, unleash your creativity, and indulge in the delightful world of homemade mini pumpkin donuts. Enjoy every bite, and don’t forget to share your delicious creations with loved ones!


