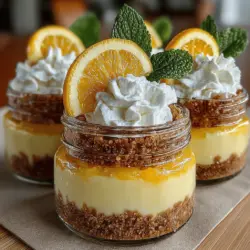
When it comes to desserts that tantalize the taste buds, few can compete with the bright and invigorating profile of a lemon cream pie. The Zesty Lemon Cream Pie in a Jar brings this classic dessert to new heights, capturing the essence of summer in a convenient and charming individual serving. This delightful treat combines the tartness of fresh lemons with a creamy filling, all nestled in a buttery graham cracker crust, making it an irresistible choice for picnics, barbecues, and casual gatherings alike.
The appeal of this dessert lies not only in its refreshing flavor but also in its presentation. Serving lemon cream pie in jars not only adds a touch of elegance but also makes it easy to transport and serve. Each spoonful delivers a perfect balance of tangy and sweet, with layers that create a delightful texture experience. Whether you’re treating your family to a weeknight dessert or impressing guests at a dinner party, this recipe is sure to become a favorite.
One of the best aspects of the Zesty Lemon Cream Pie in a Jar is its simplicity. With just a few key ingredients and straightforward steps, you can whip up this delightful dessert without spending hours in the kitchen. Plus, the individual jars make it a fun and interactive dessert option, allowing guests to enjoy their own portion while keeping the presentation neat and tidy.
Understanding the Components of Zesty Lemon Cream Pie in a Jar
To fully appreciate the Zesty Lemon Cream Pie in a Jar, it’s essential to understand its layered structure. Each component plays a vital role in creating the overall flavor and texture of the dessert, ensuring that every bite is a harmonious blend of tastes and sensations.
The Layers of Delight
1. Graham Cracker Crust: The foundation of this dessert, the graham cracker crust, provides a sweet and crunchy base that perfectly balances the tartness of the lemon filling. Its buttery flavor enhances the overall experience, making each spoonful even more enjoyable.
2. Zesty Lemon Filling: At the heart of this dessert is the creamy lemon filling, made with fresh lemon juice and zest. This layer delivers a burst of citrus flavor that is both refreshing and satisfying. The filling’s smooth texture contrasts beautifully with the crumbly crust, creating a delightful mouthfeel.
3. Cream Topping: Topping off the lemon filling is a light and fluffy cream topping that adds richness and complements the tartness of the lemon. This layer ties the dessert together, adding an extra layer of flavor and creaminess that elevates the entire dish.
Each of these components is crucial for achieving the perfect Zesty Lemon Cream Pie in a Jar. Now, let’s dive into the first step of creating this delightful dessert: preparing the crust.
The Crust: A Perfect Base for Your Lemon Filling
The graham cracker crust is more than just a base; it’s an essential part of the Zesty Lemon Cream Pie in a Jar. Its sweet, slightly nutty flavor and crunchy texture provide a wonderful contrast to the creamy filling above it. Making the crust is straightforward and can be completed in just a few steps.
Ingredients for the Graham Cracker Crust
– 1 ½ cups graham cracker crumbs
– ⅓ cup granulated sugar
– ½ cup unsalted butter, melted
Step-by-Step Preparation of the Crust
1. Preheat the Oven: Begin by preheating your oven to 350°F (175°C). This ensures that the crust will bake evenly and achieve the perfect golden-brown color.
2. Mix the Ingredients: In a mixing bowl, combine the graham cracker crumbs and granulated sugar. Stir until the sugar is evenly distributed throughout the crumbs. Next, pour in the melted butter and mix until the crumbs are thoroughly coated and the mixture resembles wet sand.
3. Press into Jars: Using your fingers or the back of a measuring cup, press the graham cracker mixture firmly into the bottom of each jar. Aim for an even layer that fills the bottom about ¼ inch thick. This will provide a sturdy base for the lemon filling.
4. Bake the Crust: Place the jars on a baking sheet and bake in the preheated oven for 8-10 minutes, or until the edges are lightly browned. Keep a close eye on them to prevent burning. Once baked, remove the jars from the oven and allow them to cool completely.
Tips for Achieving the Ideal Texture and Color
– Use Fresh Graham Crackers: For the best flavor, opt for fresh graham crackers. If they are stale, the crust may not hold together as well.
– Don’t Overmix: When mixing the graham cracker crumbs with the melted butter, be careful not to overmix. You want to achieve a crumbly texture that holds together but isn’t overly compacted.
– Cool Before Filling: Ensure that the crust is completely cooled before adding the lemon filling. A warm crust can cause the filling to melt and lose its structure.
With the crust prepared, the next step is to create the zesty lemon filling that will elevate this dessert to new heights.
Creating the Zesty Lemon Filling
The star of the Zesty Lemon Cream Pie in a Jar is undoubtedly the lemon filling. This layer is what gives the dessert its signature zing and refreshing taste. Using fresh ingredients, particularly freshly squeezed lemon juice and zest, is crucial for achieving the best flavor. Let’s break down the ingredients and the preparation process for the filling.
Ingredients for the Lemon Filling
– 1 cup granulated sugar
– ½ cup freshly squeezed lemon juice (about 3-4 lemons)
– Zest of 2 lemons
– 4 large egg yolks
– ⅓ cup unsalted butter, cut into pieces
– 2 tablespoons cornstarch
– A pinch of salt
Step-by-Step Cooking Instructions
1. Combine Ingredients: In a medium saucepan, whisk together the granulated sugar, lemon juice, lemon zest, egg yolks, cornstarch, and salt until well combined. The cornstarch will help to thicken the filling as it cooks.
2. Heat the Mixture: Place the saucepan over medium heat and cook the mixture, stirring constantly. It’s important to keep stirring to ensure that the eggs do not scramble. As the mixture heats up, it will begin to thicken.
3. Add Butter: Once the filling reaches a gentle simmer and has thickened to a custard-like consistency, remove it from the heat. Stir in the pieces of butter until they melt completely and are incorporated into the filling.
4. Cool Before Filling Jars: Allow the lemon filling to cool for about 10-15 minutes before spooning it into the prepared graham cracker crusts in the jars. This will help prevent the crust from becoming soggy.
Importance of Temperature Control
Controlling the temperature while cooking the lemon filling is crucial. If the heat is too high, the eggs can curdle, resulting in a lumpy texture. By using medium heat and stirring constantly, you can achieve a smooth and creamy filling that sets perfectly.
Achieving the Right Consistency
The goal is to have a thick, custard-like filling that will hold its shape when layered in the jars. If the filling appears too thin, continue cooking it over low heat until it thickens further. If you find that it has thickened too much, you can whisk in a tablespoon of water or lemon juice to loosen it.
Now, with the crust and lemon filling ready, the final step is to craft the cream topping that will crown this delightful dessert.
This introduction to the Zesty Lemon Cream Pie in a Jar sets the stage for an enjoyable and rewarding cooking experience. With each layered component crafted with care, you’ll create a dessert that not only looks stunning but also delivers a burst of refreshing flavor with every bite. Stay tuned for the next part, where we’ll explore how to make the luscious cream topping that completes this charming dessert.
{{image_2}}
The Role of Whipped Cream in Enhancing the Dessert’s Richness and Creaminess
Whipped cream is an essential component of the Zesty Lemon Cream Pie in a Jar, contributing not only to the dessert’s texture but also to its overall richness. The light, airy nature of whipped cream balances the tartness of the lemon filling, creating a harmonious flavor profile that is both refreshing and indulgent. When crafted correctly, whipped cream adds a luscious creaminess that elevates each spoonful of the pie, making it a delightful experience for the palate.
Instructions for Preparing the Cream Topping
To achieve the perfect whipped cream topping, follow these simple yet effective steps:
1. Choose the Right Cream: Start with heavy whipping cream, as it contains a higher fat content, allowing for better aeration and stability when whipped.
2. Chill Your Tools: Before you begin whipping, chill your mixing bowl and beaters in the refrigerator for about 15 minutes. This helps the cream whip faster and increases its volume.
3. Add Sugar and Flavor: You can sweeten your whipped cream with powdered sugar for a smoother texture. A splash of vanilla extract can also enhance flavor, though for this lemon dessert, you may opt for a hint of lemon zest to complement the filling.
4. Whip to Soft Peaks: Begin whipping the cream on medium speed. Once soft peaks form (when the cream holds a peak but the tip curls), it’s time to add your sugar and flavoring.
5. Whip to Stiff Peaks: Increase the speed to high and continue whipping until stiff peaks form. This means the whipped cream should hold its shape firmly and not droop when lifted.
Ingredients Required for the Cream Topping
To create the delicious whipped cream topping, you will need:
– 1 cup heavy whipping cream
– 2-3 tablespoons powdered sugar (adjust to taste)
– 1 teaspoon vanilla extract (optional)
– Zest of 1 lemon (optional, for added flavor)
Techniques for Achieving the Perfect Whip
– Monitor Your Speed: Start slow to avoid splattering. Gradually increase the speed as the cream starts to thicken.
– Keep an Eye on the Texture: Stop whipping when you reach soft or stiff peaks, depending on your preference. It’s easier to add a bit more air than to fix overwhipped cream.
Tips on Avoiding Overwhipping and Ensuring a Smooth Finish
– Watch Closely: Whipped cream can go from perfectly whipped to overwhipped quickly. As soon as you see stiff peaks, it’s best to stop whipping.
– Use a Rubber Spatula: If you notice any lumps, gently fold in the cream with a spatula, rather than continuing to whip, to maintain its airy texture.
– Store Properly: If you have leftover whipped cream, store it in an airtight container in the refrigerator for up to 24 hours. Re-whipping may be needed to restore its volume.
Assembling the Jars: Layering for Visual Appeal
Presentation is key in dessert preparation, especially when it comes to individual servings like our Zesty Lemon Cream Pie in a Jar. The layered look not only makes the dessert visually appealing but also creates a delightful experience as you dig into each spoonful.
Step-by-Step Guide on Assembling the Jars
1. Prepare Your Jars: Choose clear glass jars or dessert cups for serving. This allows the vibrant layers to shine through.
2. Start with the Crust: Begin by adding a layer of your prepared crust mixture to the bottom of each jar. Use a spoon or the back of a measuring cup to press it down gently, creating an even base.
3. Add the Lemon Filling: Next, spoon in a layer of the zesty lemon filling. Be careful not to disturb the crust as you add the filling.
4. Layer the Whipped Cream: Follow with a generous dollop of whipped cream. You can pipe it on for a professional look or spoon it in for a more rustic charm.
5. Repeat the Layers: Continue layering the crust, lemon filling, and whipped cream until the jars are filled, leaving some space at the top for garnishing.
Layering Techniques for the Crust and Filling
To enhance the visual appeal, consider using a piping bag for the whipped cream. This technique allows for beautiful swirls and peaks. For the crust, crumbling the cookies into small pieces can create a nice texture and contrast against the smooth lemon filling.
Suggestions for Portion Control and Aesthetics
Each jar should hold about 1 cup of dessert, making it perfect for portion control. This size is ideal for serving at gatherings or as an individual treat. You can also use smaller jars for a more delicate presentation or larger ones for a more indulgent serving.
Importance of Chilling for Setting the Filling
After assembling the jars, place them in the refrigerator for at least 2 hours. This chilling time allows the lemon filling to set properly, giving it a firm yet creamy texture that pairs perfectly with the crust and whipped cream.
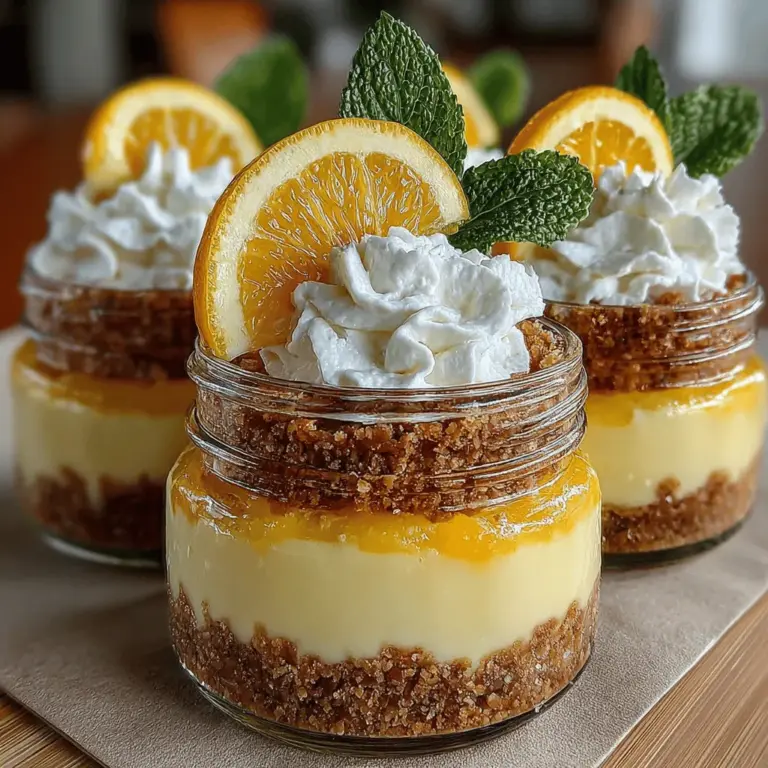
Finishing Touches: Garnishing Your Dessert
Garnishes play a significant role in elevating the visual and flavor profile of your Zesty Lemon Cream Pie in a Jar. A well-garnished dessert not only looks appealing but also enhances the overall eating experience.
The Role of Garnishes in Elevating the Dessert’s Visual and Flavor Profile
Using fresh garnishes like lemon slices and mint leaves adds a pop of color and freshness. These elements not only beautify the dessert but also provide a hint of the flavors inside, enticing your guests even before they take the first bite.
Suggestions for Garnishing with Lemon Slices and Mint
– Lemon Slices: Thinly slice fresh lemons and place one on top of the whipped cream in each jar. This adds a zesty aroma and reinforces the lemon theme of the dessert.
– Mint Leaves: A sprig of fresh mint can add a beautiful contrast to the bright yellow of the lemon filling, enhancing both the flavor and visual appeal.
Ideas for Personalizing Garnishes Based on Season or Occasion
Feel free to get creative with your garnishes! In the spring or summer, you could add edible flowers for a whimsical touch. During the fall, consider using candied ginger or a sprinkle of cinnamon for a seasonal twist. The options are endless, allowing you to personalize your dessert based on the occasion.
Serving Suggestions and Pairings
The Zesty Lemon Cream Pie in a Jar is perfect for a variety of occasions, from casual family dinners to elegant gatherings. Its refreshing flavors make it an ideal dessert for warm weather, providing a light and satisfying end to any meal.
Ideal Occasions for Serving Zesty Lemon Cream Pie in a Jar
– Summer Gatherings: Serve these jars at outdoor barbecues, picnics, or pool parties for a refreshing treat.
– Celebratory Events: Perfect for birthdays, anniversaries, or bridal showers, these jars add a touch of sophistication to any celebration.
– Casual Family Dinners: Delight your family with this easy and delicious dessert after a hearty meal.
Pairing Recommendations with Beverages or Other Dishes
– Beverages: Pair your pie in a jar with a chilled glass of lemonade, iced tea, or a light white wine for a refreshing experience.
– Other Dishes: Consider serving alongside a light salad or grilled fish to maintain a balanced meal. The zesty flavors will complement other light dishes beautifully.
Discussion on Serving at Gatherings, Picnics, or as a Refreshing Treat During Warmer Months
The portability of these jars makes them an excellent choice for gatherings and picnics. You can prepare them in advance and simply grab them when you’re ready to serve. This makes them a convenient option for busy hosts, allowing you to enjoy the event without the stress of last-minute preparations.
Conclusion
In summary, the Zesty Lemon Cream Pie in a Jar is a delightful and refreshing dessert that combines the bright flavors of lemon with the creaminess of whipped cream and the crunch of a crumbly crust. This recipe is not only easy to follow but also accessible for both novice and experienced bakers. The charming jar presentation adds an elegant touch, making it perfect for any occasion.
We encourage you to try this recipe and enjoy the bright, zesty flavors of lemon in a charming and convenient jar. Whether for a gathering, a picnic, or simply to treat yourself, this dessert is sure to impress and satisfy. So gather your ingredients, follow the steps, and get ready to indulge in this delightful treat!