
Frozen Yogurt Chocolate Mint Wedges Recipe
When it comes to satisfying sweet cravings, frozen yogurt has emerged as a popular alternative to traditional ice cream. This delightful treat not only offers a creamy texture but also packs in nutritional benefits that appeal to health-conscious dessert lovers. The recipe for Frozen Yogurt Chocolate Mint Wedges captures the best of both worlds: a rich and indulgent flavor profile with the refreshing notes of mint, making it an irresistible choice for anyone looking to indulge without the guilt.
The combination of chocolate and mint is a timeless classic, often evoking memories of after-dinner mints or decadent chocolate desserts. The coolness of mint balances beautifully with the richness of chocolate, creating a harmonious blend that tantalizes the taste buds. This recipe is perfect for those warm summer days when you want something refreshing yet satisfying. Moreover, the ease of preparation means you can whip it up in no time, making it accessible for both novice and seasoned cooks alike.
The Frozen Yogurt Chocolate Mint Wedges are not just enjoyable; they also provide a guilt-free way to treat yourself. By using Greek yogurt as the base, this recipe leverages the health benefits of yogurt, including protein and probiotics, while keeping added sugars to a minimum. With a few simple ingredients and minimal effort, you can create a dessert that feels indulgent but aligns with a healthier lifestyle.
Understanding the Ingredients
To create these delicious Frozen Yogurt Chocolate Mint Wedges, you need to understand the key ingredients that make this treat not only tasty but also nutritious.
Greek Yogurt: At the heart of this recipe is Greek yogurt, a popular ingredient known for its creamy texture and high protein content. Unlike regular yogurt, Greek yogurt undergoes a straining process that removes excess whey, resulting in a thicker consistency. This means you’re not just getting a delicious dessert; you’re also benefiting from the protein that helps keep you feeling full longer. Additionally, Greek yogurt contains probiotics, which are beneficial for gut health, making it a smart choice for those looking to enhance their overall well-being.
Honey or Maple Syrup: For sweetness, this recipe calls for natural sweeteners like honey or maple syrup. These options not only add flavor but also come with their own health benefits. Honey is known for its antioxidant properties and can help soothe a sore throat, while maple syrup contains essential minerals like manganese and zinc. Choosing these natural sweeteners over refined sugars means you’re opting for a more wholesome dessert that aligns with a healthier diet.
Unsweetened Cocoa Powder: Cocoa powder is another star ingredient in this recipe. It provides a rich chocolate flavor without the added sugars found in many chocolate products. Unsweetened cocoa powder is packed with antioxidants and has been linked to various health benefits, including improved heart health and reduced inflammation. Incorporating cocoa into your dessert means you can enjoy the indulgent taste of chocolate while still being mindful of your health.
Peppermint Extract: The flavor profile of this recipe is enhanced with peppermint extract. This ingredient not only brings a refreshing taste but also has potential health benefits. Peppermint can aid digestion and help relieve headaches, making it a beneficial addition to your dessert. Its invigorating aroma and flavor make it an ideal match for chocolate, creating a dessert that is both satisfying and refreshing.
Dark Chocolate: To elevate the treat, dark chocolate is used for coating the wedges. Dark chocolate is known for its higher cocoa content compared to milk chocolate, which means it is lower in sugar and packed with more antioxidants. Consuming dark chocolate in moderation can offer various health benefits, including improved heart health and enhanced brain function. By opting for dark chocolate, you’re making a more health-conscious choice without sacrificing flavor.
Coconut Oil: While optional, coconut oil can be added to the chocolate coating for a smoother texture. Coconut oil is praised for its medium-chain fatty acids that may support metabolism and provide quick energy. It also adds a subtle tropical flavor to the chocolate coating, enhancing the overall experience of the dessert.
Step-by-Step Guide to Making Frozen Yogurt Chocolate Mint Wedges
Preparing the Base
The first step in creating your Frozen Yogurt Chocolate Mint Wedges is to prepare the base. Begin by taking a generous cup of Greek yogurt and transferring it to a mixing bowl. The yogurt should be at room temperature to facilitate easier mixing. Add in your chosen sweetener—whether it’s honey or maple syrup—along with unsweetened cocoa powder and a few drops of peppermint extract. The key to achieving a deliciously smooth and flavorful base is to mix these ingredients thoroughly until you achieve a uniform consistency. A whisk or a hand mixer works wonders in breaking down any lumps and ensuring that the cocoa powder is fully incorporated.
For optimal flavor, taste the mixture after blending. This is your opportunity to adjust the sweetness or mintiness to your liking. If you prefer a stronger mint flavor, feel free to add a little more peppermint extract, but be cautious, as it can quickly become overpowering.
Lining the Baking Dish
Once your yogurt mixture is ready, it’s time to prepare the baking dish. Line a baking dish with parchment paper to ensure easy removal of the frozen wedges later on. Using parchment paper not only prevents the yogurt mixture from sticking but also allows you to lift out the frozen wedges without any hassle. For this recipe, an 8×8-inch or a similar-sized dish works well, but you can adjust the size based on how thick you want your wedges to be.
Spreading the Mixture
With the baking dish lined, pour the yogurt mixture into the dish and spread it evenly using a spatula. Make sure to distribute the mixture uniformly to ensure even freezing. A smooth, flat surface will help you achieve perfectly shaped wedges. Take your time with this step; a well-spread mixture will result in aesthetically pleasing wedges that are easy to slice after freezing.
Freezing Process
Now that your mixture is spread out, it’s time to freeze. Place the baking dish in the freezer and allow it to freeze for a minimum of four hours, or until the yogurt is completely solid. To achieve the perfect consistency, check the mixture after about three hours; if it’s still soft, give it additional time. Once frozen, the yogurt should be firm enough to slice into wedges without crumbling.
This initial freezing process is crucial, as it sets the foundation for your dessert. Ensure that the wedges are fully frozen before proceeding to the next step, where the indulgent chocolate coating will be added.
Stay tuned for the next part of this recipe, where you will learn how to create the decadent chocolate coating and finish off your delightful Frozen Yogurt Chocolate Mint Wedges!
{{image_2}}
Melting the Chocolate
Melting chocolate is a crucial step in making your Frozen Yogurt Chocolate Mint Wedges. Properly melted chocolate will enhance the texture and flavor of your dessert. Here are some best practices for safely melting chocolate in the microwave:
1. Use the Right Container: Choose a microwave-safe bowl, preferably glass or ceramic, as these materials distribute heat evenly.
2. Chop the Chocolate: Cut your chocolate into small, uniform pieces. This will help it melt more evenly and prevent burning.
3. Microwave in Short Intervals: Heat the chocolate in 20 to 30-second intervals, stirring in between. This is essential to prevent overheating, as chocolate can burn quickly if left unattended.
4. Look for Smoothness: When the chocolate is almost melted but still has some lumps, remove it from the microwave and stir until completely smooth. The residual heat will help melt the remaining pieces.
For those looking to enhance the texture of their melted chocolate, adding a small amount of coconut oil can work wonders. Coconut oil not only adds a subtle flavor but also gives the chocolate a glossy finish and improves its fluidity for dipping and drizzling.
Cutting into Wedges
Once your frozen yogurt has set, it’s time to cut it into wedges. Use these techniques for slicing the frozen yogurt into perfect shapes:
1. Warm the Knife: Dip your knife in warm water and wipe it dry before cutting. This will make slicing through the frozen yogurt much easier and will prevent it from sticking to the knife.
2. Cutting Technique: For wedges, start by cutting the frozen block in half, then cut each half into thirds or quarters, depending on your desired size. Aim for even thickness for a uniform presentation.
3. Experiment with Shapes: If you’re feeling creative, try different shapes! Use cookie cutters for fun designs or cut into squares for a more modern look.
Consider different serving sizes based on your occasion. Smaller wedges are perfect for a light dessert, while larger pieces can serve as a more indulgent treat.
Chocolate Coating
Now that your wedges are cut, it’s time for the delicious chocolate coating. Here are methods for dipping and drizzling the chocolate over your wedges:
1. Dipping: Hold each wedge by one end and dip it into the melted chocolate, ensuring it’s coated evenly. Allow excess chocolate to drip off before placing it on a parchment-lined baking sheet.
2. Drizzling: For a decorative touch, use a fork to drizzle melted chocolate over the wedges. This adds a beautiful finish and a bit of extra chocolate without fully coating the wedges.
3. Managing Excess Chocolate: To avoid a messy finish, ensure that you tap the dipped wedge gently to remove any excess chocolate. This will create a clean and polished appearance.
Refreezing
Refreezing your coated wedges is a vital step. This allows the chocolate to harden properly and creates that satisfying snap when you bite into them. Here’s how to do it effectively:
1. Chill on a Baking Sheet: Place the coated wedges on a baking sheet lined with parchment paper and put them back in the freezer for at least 30 minutes. This will ensure the chocolate is fully set and the wedges are firm.
2. Storage: Once fully frozen, transfer the wedges to an airtight container, separating layers with parchment paper to prevent sticking. They can be stored in the freezer for up to two weeks.
Serving and Garnishing
Presentation is key when serving your Frozen Yogurt Chocolate Mint Wedges. Here are some suggestions for an appealing presentation:
1. Plating: Arrange the wedges on a beautiful serving platter or individual dessert plates. A colorful plate can enhance the visual appeal of the dessert.
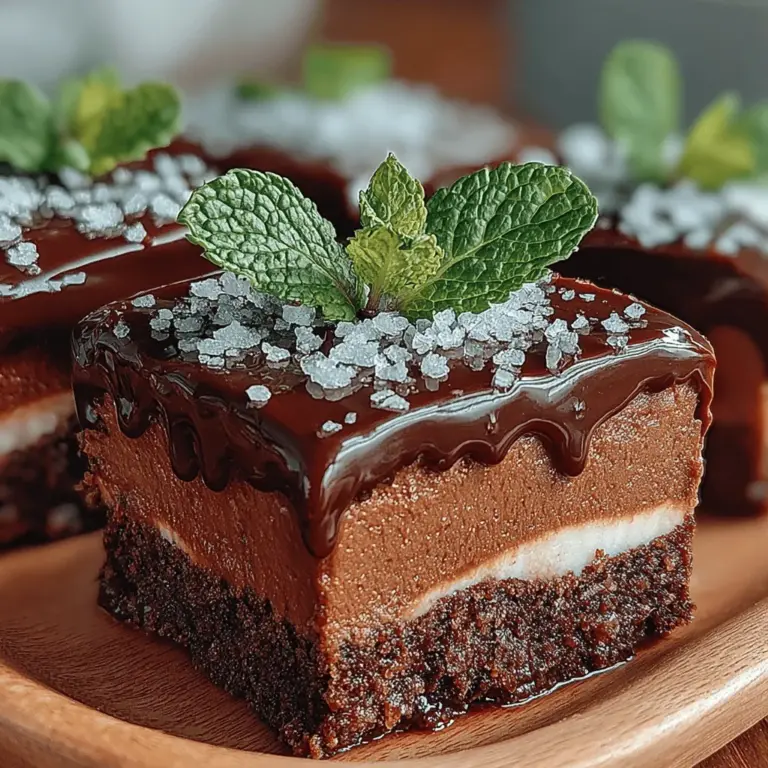
2. Garnishing: For an extra touch, consider garnishing with fresh mint leaves. This adds a pop of color and a refreshing aroma that complements the chocolate mint flavor.
3. Serving Suggestions: Pair your wedges with a scoop of additional yogurt or a drizzle of chocolate sauce for those who want an extra indulgent treat.
Nutritional Benefits of Frozen Yogurt Chocolate Mint Wedges
Frozen Yogurt Chocolate Mint Wedges offer a healthier alternative to traditional desserts. Here’s a breakdown of their nutritional benefits:
1. Lower Calories: Compared to ice cream, frozen yogurt generally has fewer calories, making these wedges a guilt-free dessert option.
2. Protein Content: Frozen yogurt is typically higher in protein than ice cream, providing a satisfying treat that can help curb your sweet tooth without the added sugar crash.
3. Dietary Versatility: This recipe is adaptable to fit various dietary preferences. It can easily be made gluten-free by ensuring all ingredients are certified gluten-free, and it’s vegetarian-friendly, making it accessible for a wide audience.
Creative Variations of the Recipe
While the classic Frozen Yogurt Chocolate Mint Wedges are delicious on their own, there are many ways to get creative:
1. Ingredient Substitutions: Try using different yogurt flavors such as strawberry, vanilla, or even coconut for a tropical twist. You can also experiment with sweeteners like honey or agave syrup to adjust the flavor profile.
2. Additional Toppings: Consider adding crushed nuts, granola, or fresh fruits like strawberries or raspberries on top of your wedges for added texture and flavor.
3. Seasonal Variations: Customize your wedges for holidays or special occasions. For example, during the fall, you might incorporate pumpkin spice yogurt, or during the winter, a peppermint-flavored yogurt would be perfect for a festive touch.
Conclusion
Frozen Yogurt Chocolate Mint Wedges are not only a delicious treat but also a healthier alternative to traditional desserts. With their creamy texture, rich chocolate coating, and refreshing mint flavor, these wedges are perfect for any occasion. They provide a satisfying way to indulge without the guilt, making them an ideal dessert for health-conscious individuals.
Encouraging readers to try this easy recipe is essential; they’ll be delighted by the creamy, decadent taste and the fun of creating their own frozen treats. Experience the joy of making and enjoying Frozen Yogurt Chocolate Mint Wedges—your taste buds will thank you!
