
Juicy Classic Cheeseburgers: A Tribute to an American Icon
Cheeseburgers hold a special place in the heart of American cuisine. Since their inception in the early 20th century, they have evolved from simple sandwiches into culinary masterpieces enjoyed by millions. Whether at backyard barbecues, family gatherings, or casual weeknight dinners, cheeseburgers are a staple that resonates with people of all ages. This recipe for Juicy Classic Cheeseburgers not only captures the essence of this beloved dish but also provides a step-by-step guide to crafting the perfect burger in the comfort of your own kitchen.
Creating the ultimate cheeseburger at home is an art that goes beyond just slapping a patty on a bun. It involves understanding the nuances of flavor and texture, as well as mastering the cooking techniques that elevate a good burger to greatness. This recipe is designed to guide you through the process, ensuring that your cheeseburger is juicy, flavorful, and sure to impress your guests or family.
Understanding the Ingredients
Before diving into the preparation process, it’s essential to understand the ingredients that make up a classic cheeseburger. Each component plays a crucial role in achieving the perfect balance of flavor and texture.
1. Ground Beef: The star of the cheeseburger is undoubtedly the ground beef. For optimal juiciness and flavor, an 80/20 blend of ground beef is recommended. This means that the meat contains 80% lean muscle and 20% fat. The fat content is vital; it not only contributes to the burger’s moisture but also enhances its rich flavor. Choosing high-quality beef from a reputable source can make a significant difference in the final product.
2. Seasoning: While the beef should shine on its own, proper seasoning is essential to bring out its natural flavors. A simple combination of salt and pepper is often all that’s needed, but you can experiment with other spices and herbs to suit your taste. The key is to season the meat just before cooking to ensure that the flavors penetrate the patty without breaking down the proteins too early.
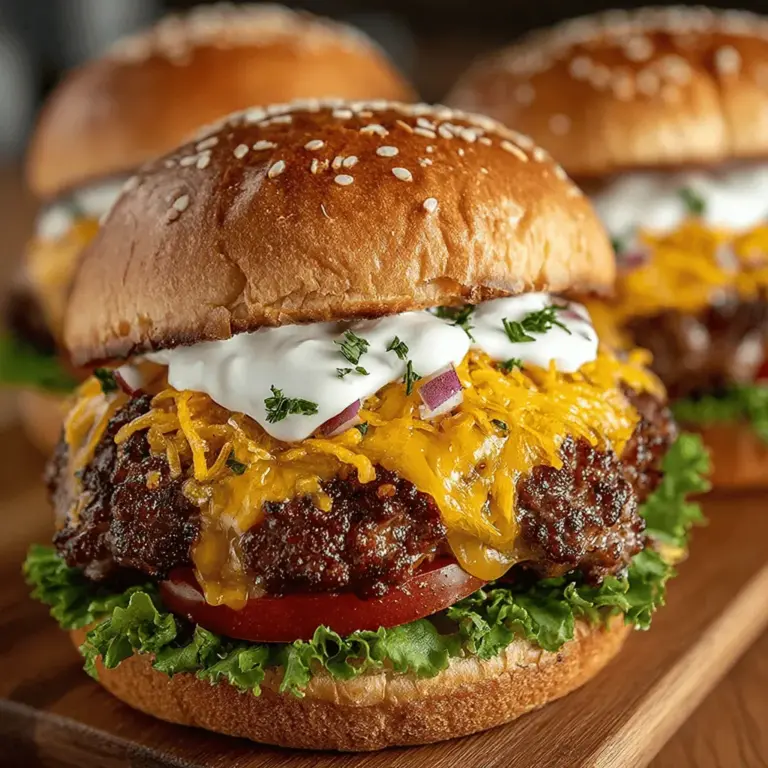
3. Cheese: No cheeseburger is complete without cheese. Classic choices include American, cheddar, or Swiss. The type of cheese you choose can significantly affect the overall taste and mouthfeel of the burger. American cheese, known for its meltability, is a popular choice for that gooey layer of goodness.
4. Buns: The bun serves as the foundation of your cheeseburger. A good burger bun should be sturdy enough to hold the ingredients together without falling apart, yet soft enough to provide a pleasant bite. Brioche or sesame seed buns are popular options that add a touch of sweetness and texture.
5. Toppings: While the basics of a cheeseburger are simple, the toppings can range from classic lettuce, tomato, and onion to gourmet options like avocado and jalapeños. The choice of toppings can personalize your burger and elevate its flavor profile.
Preparation Steps for Perfect Burgers
Now that you have a grasp of the essential ingredients, it’s time to move on to the preparation steps for making your Juicy Classic Cheeseburgers. The process is straightforward, but there are key techniques to ensure tenderness and flavor.
1. Mixing the Ingredients: Start by placing the ground beef in a large mixing bowl. It’s important to handle the meat gently to avoid overworking it, which can lead to tough burgers. Using your hands, lightly mix in your chosen seasoning. If you’re feeling adventurous, you can also incorporate finely chopped onions or garlic for added depth of flavor—just be sure not to over-mix.
2. Shaping the Patties: Once your beef is seasoned, it’s time to shape the patties. Divide the mixture into equal portions—typically 6 to 8 ounces for a generous burger. Roll each portion into a ball, then gently flatten it into a patty. To ensure even cooking, create an indentation in the center of each patty with your thumb. This indentation helps the burger cook evenly and prevents it from puffing up on the grill or stovetop.
3. Chilling the Patties: After shaping the patties, it’s beneficial to chill them in the refrigerator for about 30 minutes before cooking. This step helps the patties hold their shape during cooking and enhances their juiciness.
Cooking Techniques for Juicy Results
The cooking method you choose can have a significant impact on the final result of your cheeseburger. Whether you opt for grilling or using a skillet, there are key techniques to keep in mind to achieve juicy, flavorful burgers.
1. Preheating: Before cooking, make sure your grill or skillet is preheated to a high temperature. For grilling, aim for a temperature of around 450°F to 500°F. If using a skillet, add a small amount of oil to prevent sticking and allow it to heat until shimmering.
2. Cooking the Patties: Once your cooking surface is hot, carefully place the patties on it. Avoid the temptation to press down on the patties with a spatula; this releases the flavorful juices that keep your burger moist. Cook the patties for about 3-4 minutes on one side before flipping them. The perfect flip will create a nice crust without losing precious juices.
3. Checking Doneness: For those who prefer their burgers cooked to a specific doneness, it’s crucial to monitor the internal temperature. Use a meat thermometer to check for doneness:
– Rare: 120°F to 125°F
– Medium Rare: 130°F to 135°F
– Medium: 140°F to 145°F
– Medium Well: 150°F to 155°F
– Well Done: 160°F and above
4. Adding Cheese: If you’re a cheese lover, place a slice of your preferred cheese on top of the patty during the last minute of cooking. Cover the grill or skillet to help the cheese melt beautifully.
By following these preparation and cooking techniques, you’ll be well on your way to creating mouthwatering Juicy Classic Cheeseburgers that will delight family and friends alike. In the next section, we will explore how to assemble your burger and the best ways to dress it up with toppings that complement the rich flavors of the patty.
{{image_2}}
The Cheese Factor
When it comes to crafting the quintessential cheeseburger, the cheese you choose plays a pivotal role. It not only adds creaminess and flavor but also elevates the overall experience of each bite. While there are many cheese varieties available, classic choices like American, cheddar, Swiss, and pepper jack are popular for their melting characteristics and complementary flavors.
Importance of Cheese in a Classic Cheeseburger
Cheese is crucial in balancing the savory elements of the beef patty. A well-melted slice of cheese can enhance the juicy, rich flavors of the meat while adding a delightful creaminess. Additionally, the type of cheese can influence the flavor profile of your cheeseburger. For example, American cheese offers a smooth, mild taste, while sharp cheddar lends a more robust flavor.
Best Practices for Melting Cheese on the Patties
To achieve that perfect melt, timing and technique are essential. After flipping your burger patty for the last time—ideally when it’s about a minute away from being done—place a slice of cheese directly on top of the patty. Cover the grill or skillet with a lid or a large piece of aluminum foil to trap the heat. This method helps the cheese melt evenly while allowing the patty to finish cooking.
If you want to get creative, consider using a small amount of water in the skillet along with the lid; the steam generated will help the cheese melt faster. Aim for a gooey, melted layer that binds the flavors together without overpowering the beef.
Bun Toasting: A Critical Final Touch
A toasted bun is not just an aesthetic choice; it significantly enhances the overall burger experience. A toasted bun provides a satisfying crunch that contrasts beautifully with the juicy patty and melted cheese, while also adding a layer of flavor.
Techniques for Toasting Buns for Optimal Texture and Flavor
1. Grill Method: Place your buns cut-side down on the grill during the last few minutes of cooking the patties. Keep an eye on them to prevent burning, as they can toast quickly.
2. Skillet Method: Heat a skillet over medium heat. Add a thin layer of butter or olive oil to the skillet, and then place the buns cut-side down. Toast for about 2-3 minutes or until golden brown.
3. Oven Method: Preheat your oven to 350°F (175°C). Arrange the buns cut-side up on a baking sheet and toast in the oven for about 5-7 minutes. This method is great for toasting multiple buns at once, especially if you are hosting a gathering.
No matter the method, toasting your buns will ensure they hold up against the burger juices and toppings, preventing a soggy mess.
Building the Perfect Cheeseburger
Now that you have your perfectly cooked patty and melted cheese, it’s time to assemble your classic cheeseburger. The order in which you layer your ingredients can affect the taste and overall experience of your burger.
Step-by-Step Assembly Guide for Burgers
1. Start with Lettuce: Begin by placing a leaf of crisp lettuce on the bottom bun. This not only adds a refreshing crunch but also serves as a barrier to keep the bun from becoming soggy.
2. Add the Patty: Place your cheeseburger patty directly on top of the lettuce. The melted cheese should be facing upward, ready to complement the toppings.
3. Toppings and Condiments: Add your desired toppings. Classic choices include sliced tomatoes, pickles, and onions. Drizzle your choice of condiments, such as ketchup, mustard, or mayonnaise, over the toppings. Ensure to distribute these ingredients evenly to enhance every bite.
4. Top It Off: Finally, crown your masterpiece with the top bun. Press down gently to combine the flavors.
Suggestions for Optional Toppings
To take your cheeseburger to the next level, consider adding some unique toppings:
– Red Onion: Adds a sharp bite and a pop of color.
– Avocado: Creamy and rich, avocado pairs well with beef.
– Bacon: Crispy bacon adds a smoky flavor that complements the cheese.
– Sautéed Mushrooms: Earthy and savory, mushrooms can elevate your burger’s flavor profile.
– Jalapeños: For those who enjoy a kick, fresh or pickled jalapeños can add heat.
Feel free to experiment with your toppings and condiments to create a personalized burger that satisfies your cravings.
Serving Suggestions and Pairings
The perfect cheeseburger deserves equally delicious sides to create a well-rounded meal. Here are some ideas for sides that complement your juicy classic cheeseburger:
1. Fries: Crispy French fries are a timeless pairing. Consider variations like sweet potato fries or loaded fries topped with cheese and bacon for a fun twist.
2. Garden Salad: A light, refreshing garden salad can balance the richness of the burger. Use seasonal vegetables and a light vinaigrette for a fresh taste.
3. Coleslaw: This crunchy side offers a tangy contrast that works well with the savory flavors of the burger.
4. Onion Rings: For a crunchy indulgence, serve your cheeseburger with crispy onion rings. The sweetness of the onions complements the savory beef nicely.
Presentation Tips for an Appetizing Display
Presentation matters, especially when sharing your culinary creations with others. Here are a few tips to make your cheeseburgers look as good as they taste:
– Use Rustic Serving Boards: Wooden boards add a rustic charm and make for an eye-catching display.
– Colorful Side Dishes: Incorporate colorful side dishes to make the plate visually appealing. Brightly colored salads or vibrant dips can enhance the overall look.
– Garnish with Fresh Herbs: Sprigs of parsley or dill can add a splash of green and freshness to your plate.
Conclusion
Creating classic cheeseburgers at home is not just about the ingredients; it’s about the joy and satisfaction of cooking and sharing with loved ones. The process—from selecting the perfect meat and cheese to toasting the buns and assembling the layers—allows you to customize each burger to your liking.
Don’t hesitate to experiment with flavors, toppings, and cooking methods to create a personalized burger experience that reflects your tastes. Remember, food is meant to be shared, and there’s nothing quite like gathering around the table with family and friends to enjoy a homemade cheeseburger. So fire up your grill, gather your ingredients, and dive into the delightful world of cheeseburgers—where every bite is a celebration of flavor and togetherness.
