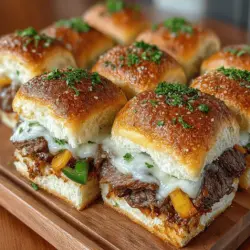
Cheesy Philly Cheesesteak Sliders: A Delicious Twist on a Classic Favorite
When it comes to satisfying cravings for savory, cheesy goodness, few dishes can rival the iconic Philly cheesesteak. But what if you could take this beloved sandwich and transform it into a bite-sized delight? Enter the cheesy Philly cheesesteak sliders—an irresistible fusion that perfectly balances the gooey, melty cheese with tender steak, all nestled in soft rolls. These sliders are not only a fantastic party snack but also an easy dinner option that will leave everyone asking for seconds.
The Allure of Cheesesteak Sliders
The cheesesteak, a staple of American cuisine, hails from the streets of Philadelphia, where it has earned a legendary status as a comfort food classic. Traditionally made with thinly sliced ribeye steak, sautéed onions, and gooey cheese, the cheesesteak has become a symbol of indulgence. In recent years, the slider trend has taken the culinary world by storm, offering a fun, shareable way to enjoy favorite dishes in a smaller format.
Cheesesteak sliders embody the best of both worlds. Their bite-sized nature makes them perfect for gatherings, whether it’s a game day party, a family dinner, or a casual get-together with friends. Sliders are inherently versatile; you can customize them with various toppings and sauces, and they can be prepared ahead of time, then baked fresh when you’re ready to serve. This makes them an ideal option for hosts looking to please a crowd with minimal fuss.
Ingredients Breakdown
To create cheesy Philly cheesesteak sliders that are bursting with flavor, you’ll need a handful of quality ingredients. Here’s a closer look at what makes each component essential to the recipe.
Ribeye Steak
The star of the show is undoubtedly the ribeye steak. Known for its rich marbling and tender texture, ribeye delivers a depth of flavor that is simply unmatched. When cooked properly, it offers a juicy bite that pairs perfectly with the other ingredients. For the best results, freeze the steak for about 30 minutes before slicing; this makes it easier to achieve those thin, even slices that are characteristic of a classic cheesesteak.
Vegetables
A well-rounded cheesesteak requires more than just meat and cheese. Onions, green bell peppers, and mushrooms add layers of flavor and texture. The sweetness of caramelized onions complements the savory meat, while the green bell pepper contributes a fresh crunch. Mushrooms add an earthy richness that enhances the overall profile of the sliders. These vegetables not only elevate the taste but also provide a beautiful contrast in color.
Cheese Selection
No cheesesteak is complete without cheese, and for these sliders, provolone is the cheese of choice. Its exceptional melting properties make it ideal for achieving that deliciously gooey texture that everyone craves. Provolone has a mild flavor that pairs beautifully with the savory meat and caramelized vegetables, allowing all the elements to shine without overpowering one another.
Slider Rolls
For the foundation of your sliders, the choice of bread is critical. Hawaiian rolls are a popular option for their soft, slightly sweet flavor that complements the savory filling. Their pillowy texture allows them to soak up some of the delicious juices from the filling without falling apart, creating a perfect bite every time. Alternatively, you can choose other soft breads that will hold up to the fillings while providing a satisfying chew.
Additional Ingredients
To enhance the overall flavor of your cheesesteak sliders, a few additional ingredients are necessary. Mayonnaise adds a creamy richness that balances the savory elements. A splash of Worcestershire sauce introduces a depth of umami flavor, tying all the components together seamlessly. These ingredients may seem simple, but they play a crucial role in elevating the sliders from ordinary to extraordinary.
Preparation Steps Explained
Now that you have a comprehensive understanding of the ingredients, let’s dive into the preparation process to ensure your cheesy Philly cheesesteak sliders turn out perfectly.
Preparing the Steak
Start by preparing the ribeye steak. As mentioned earlier, placing the steak in the freezer for about 30 minutes will firm it up, making it easier to slice thinly. Once you have your thin slices, season them generously with salt and pepper. This step is vital as it enhances the natural flavor of the meat and ensures that every bite is delicious.
Sautéing the Vegetables
In a large skillet, heat a bit of oil over medium heat and add the sliced onions, green bell peppers, and mushrooms. Sauté the vegetables until they are tender and caramelized, which should take around 5-7 minutes. The goal is to bring out their natural sweetness, which will complement the savory steak beautifully. Stir occasionally to prevent burning and achieve an even golden-brown color.
Cooking the Steak
Once the vegetables are nicely caramelized, push them to the side of the skillet and add the seasoned steak to the pan. Cook the steak for 2-3 minutes, stirring to ensure even cooking. It’s crucial to avoid overcooking the meat, as this can lead to a tough texture. The steak should be just cooked through, tender, and juicy.
Combining Ingredients
After the steak is cooked to perfection, mix it with the sautéed vegetables in the skillet. This step not only combines the flavors but also creates a cohesive filling for your sliders. Once everything is well mixed, remove the skillet from the heat and set it aside while you prepare the slider rolls.
With these foundational steps complete, you’re well on your way to creating a batch of cheesy Philly cheesesteak sliders that will delight your guests and satisfy your cravings. The combination of tender steak, flavorful vegetables, and melty cheese, all nestled in soft rolls, makes these sliders an unforgettable snack or meal option.
{{image_2}}
Assembling the Sliders
The assembly of your Cheesy Philly Cheesesteak Sliders is where the magic happens. It’s not just about putting ingredients together; it’s about layering flavors to ensure each bite is an explosion of taste.
Spreading Mayonnaise
Start by spreading a generous layer of mayonnaise on the bottom half of the slider buns. This step adds creaminess and moisture, elevating the overall flavor profile of the sliders. Mayonnaise acts as a barrier, preventing the buns from getting soggy from the cheesesteak mixture. Use a spatula or the back of a spoon to evenly coat the surface. This simple yet effective technique ensures that every bite remains juicy and flavorful, setting the stage for the delicious layers to come.
Layering the Cheesesteak Mixture
Next, it’s time to layer the cheesesteak mixture. Evenly distribute the sautéed beef, onions, and peppers over the mayonnaise-coated buns. Using a spatula, spread the mixture out so that each slider is filled to the brim with the savory goodness. This ensures that every bite you take is packed with the rich flavors of the cheesesteak, from the tender beef to the sweet sautéed onions and peppers. If you have any leftover mixture, feel free to top it off for extra flavor.
Adding Cheese
The pièce de résistance of these sliders is the cheese. After layering the cheesesteak mixture, sprinkle a generous amount of shredded provolone or cheese whiz over the top. The placement of the cheese is crucial for achieving that optimal melt and gooey consistency. If you prefer extra cheesiness, you can even add a second layer of cheese on top of the mixture. For ultimate cheesesteak authenticity, consider using a combination of provolone and mozzarella. The melty blend will create a deliciously stretchy cheese pull that will have everyone reaching for seconds.
Baking the Sliders
Once the sliders are assembled, it’s time to bake them to perfection. This is where the sliders transform from a simple assembly of ingredients into a beautifully golden and irresistibly cheesy dish.
Preheating the Oven
Preheat your oven to 350°F (175°C). This temperature is ideal for achieving that perfectly golden top while ensuring the inside is heated through. A well-preheated oven is key to getting that desirable crispness on the buns without burning them.
Covering with Foil
Before placing the sliders in the oven, cover the baking dish with aluminum foil. This step is essential as it helps steam the sliders, keeping them moist during the initial baking phase. The foil traps heat and moisture, allowing the cheese to melt evenly while preventing the tops from browning too quickly.
Final Baking for Golden Brown Finish
After about 15-20 minutes of baking with the foil on, remove it to allow the sliders to crisp up beautifully. Continue baking for an additional 10 minutes or until the tops are golden brown and the cheese is bubbling. This final step is crucial for achieving that mouthwatering, crunchy texture that perfectly complements the soft, cheesy filling.
Presentation and Serving Suggestions
Presentation is key when it comes to serving your Cheesy Philly Cheesesteak Sliders. A well-presented dish not only enhances the dining experience but also makes it more appealing to guests.
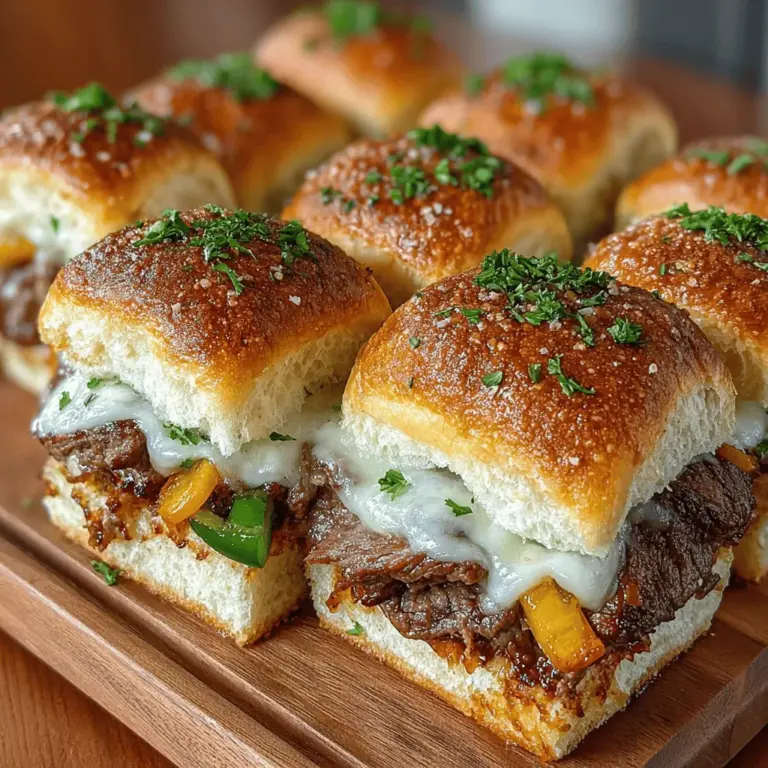
Serving on a Wooden Board
Consider serving your sliders on a rustic wooden board. The natural wood adds an aesthetic touch that enhances the visual appeal of the sliders. It also provides a sturdy surface for guests to help themselves while adding a cozy, homey feel to your gathering. Pair the sliders with some pickles or chips on the side for a full meal experience.
Garnishing with Parsley
To elevate the dish even further, garnish the sliders with freshly chopped parsley. Not only does this add a pop of color, but it also introduces a hint of fresh flavor that complements the richness of the cheesesteak. The bright green parsley is a simple touch that can transform your dish from ordinary to extraordinary.
Using Toothpicks
For easy serving at parties or gatherings, insert toothpicks into each slider. This not only makes them easier to pick up but also adds a fun, casual element to your presentation. Plus, it keeps the sliders intact and prevents them from toppling over when being served.
Nutritional Information
Understanding the nutritional aspects of your Cheesy Philly Cheesesteak Sliders can help you make informed choices, especially when serving guests. Each slider typically contains approximately 300-350 calories, making them a hearty yet satisfying option. They are packed with protein, thanks to the beef, along with carbohydrates from the slider buns.
However, keep in mind that these sliders do contain a higher fat content due to the cheese and mayonnaise, which is something to consider for those monitoring their fat intake. If you’re looking for a lighter option, consider using leaner cuts of beef or reducing the amount of cheese. Additionally, you can substitute whole wheat slider buns for a healthier alternative.
Conclusion
Making and sharing Cheesy Philly Cheesesteak Sliders is a delightful experience that combines convenience, flavor, and fun. This recipe is perfect for game days, family gatherings, or simply a cozy night in. The joy of creating these sliders lies not only in the cooking process but also in the smiles they bring to the faces of those who enjoy them.
With their layers of flavors, gooey cheese, and perfectly toasted buns, these sliders are sure to be a hit. Don’t hesitate to experiment with different toppings or variations to make this recipe your own. Enjoy the process, savor the delicious results, and watch as these sliders become a favorite for any occasion.


