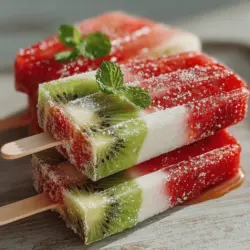
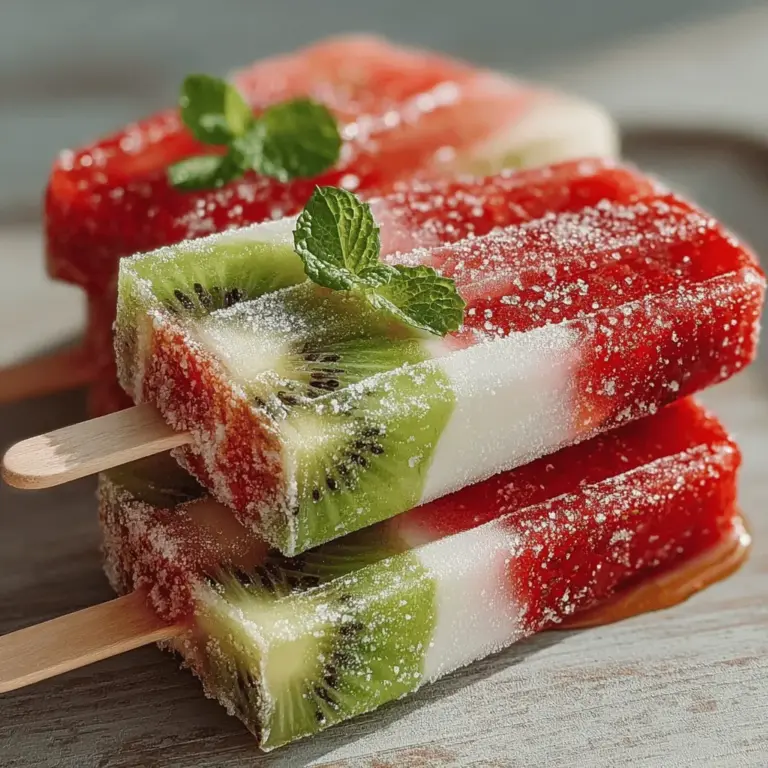
Frosty Strawberry Kiwi Bliss Pops: A Refreshing Summer Treat
As the summer sun blazes overhead, finding ways to cool down becomes a top priority. What better way to beat the heat than with a homemade popsicle that is not only delicious but also brimming with wholesome ingredients? Enter the Frosty Strawberry Kiwi Bliss Pops—a vibrant and refreshing treat that combines the natural sweetness of strawberries and kiwis with the creaminess of yogurt. These popsicles are the perfect solution for those long, hot days, offering an ice-cold respite that is as enjoyable as it is nutritious.
In a world where processed snacks often dominate the market, creating your own frozen treats at home is an empowering choice. By using fresh fruits and yogurt, you can craft a delightful dessert that caters to your taste buds while prioritizing health. These Strawberry Kiwi Bliss Pops are not only a hit with kids but also with adults looking for a guilt-free indulgence. With a simple recipe and a handful of ingredients, you can create popsicles that are refreshingly tangy, naturally sweet, and incredibly satisfying.
The Allure of Homemade Popsicles
The trend of making homemade popsicles has surged in popularity over recent years, and for good reason. One of the most appealing aspects is the control you have over the ingredients. Unlike store-bought popsicles, which often contain artificial flavors, preservatives, and added sugars, homemade versions allow you to choose exactly what goes into your creation. This means you can tailor your pops to be healthier without sacrificing taste, making them a perfect fit for various dietary preferences, including vegan or gluten-free diets.
Customization is another significant advantage of making your own popsicles. Whether you prefer a fruit-forward flavor, a creamy texture, or a blend of both, the possibilities are endless. You can mix and match fruits, adjust sweetness levels, or even add in superfoods like chia seeds or spinach for an extra nutritional boost. The only limit is your imagination. Not to mention, homemade popsicles are often more cost-effective than their store-bought counterparts, allowing you to enjoy gourmet flavors without breaking the bank.
Understanding the Ingredients
To create the Frosty Strawberry Kiwi Bliss Pops, it’s essential to understand the role each ingredient plays, not only in flavor but also in nutrition. Here’s a closer look at the key components of this refreshing treat:
– Fresh Strawberries: These bright red berries are not only visually appealing but also packed with nutrients. Strawberries are an excellent source of vitamin C, which is crucial for immune function and skin health. They are also rich in antioxidants, helping to combat oxidative stress in the body. Their natural sweetness makes them an ideal base for popsicles, providing a fruity flavor that is hard to resist.
– Kiwi: Known for its unique taste and vibrant green color, kiwi is a nutritional powerhouse. It is a great source of vitamin K, which is important for bone health and proper blood clotting. Additionally, kiwi provides a good amount of fiber, which aids in digestion and helps keep you feeling fuller for longer. The tartness of kiwi pairs beautifully with the sweetness of strawberries, creating a harmonious blend that tantalizes the taste buds.
– Greek Yogurt: This ingredient serves as the creamy base for our popsicles. Rich in protein, Greek yogurt not only adds a satisfying texture but also contributes to a feeling of fullness. It’s packed with probiotics, which promote gut health and aid digestion. By incorporating Greek yogurt, you also add a subtle tang that balances the sweetness of the fruits.
– Coconut Water: Known for its hydrating properties, coconut water is a fantastic addition to these popsicles. It contains natural electrolytes, making it an excellent choice for replenishing fluids on a hot day. The light, tropical flavor of coconut water complements both strawberries and kiwis, enhancing the overall taste experience.
– Honey or Maple Syrup: Depending on your preference, you can choose either honey or maple syrup as a natural sweetener. Both options provide a hint of sweetness without the need for refined sugars. Honey offers additional health benefits, such as antimicrobial properties, while maple syrup is rich in antioxidants and minerals like manganese and zinc. Adjusting the amount of sweetener in your recipe allows you to customize the flavor to your liking.
– Lime Juice: A splash of lime juice adds brightness to the popsicles, balancing out the sweetness and enhancing the fruity flavors. The acidity from the lime not only elevates the taste but also provides a refreshing zing that is especially delightful in the summer heat.
– Optional Mint Leaves: For those looking to elevate their popsicles further, adding fresh mint leaves as a garnish can make a significant difference. Mint adds a refreshing layer of flavor and enhances the overall presentation of your popsicles, making them perfect for serving at summer gatherings or simply enjoying on a sunny afternoon.
As you gather these ingredients, you’ll find that making Frosty Strawberry Kiwi Bliss Pops is not only simple but also an enjoyable process. The vibrant colors and enticing aromas will make the experience even more rewarding, setting the stage for a delicious treat that your family and friends will love.
In the next part of this article, we will delve into the step-by-step process for making these delightful popsicles, ensuring you have all the information you need to create your own refreshing summer treat.
{{image_2}}
Creating your own Frosty Strawberry Kiwi Bliss Pops is a delightful way to enjoy a refreshing treat packed with flavor. This guide will walk you through each step, ensuring that your popsicles turn out perfectly every time. From preparing the fruit to serving suggestions, let’s dive into the details.
Preparing the Fruit
The first step in crafting these delicious pops is properly preparing your strawberries and kiwis. Start by selecting ripe, fresh fruit for the best flavor.
1. Strawberries: Rinse the strawberries under cool water, removing any dirt. Remove the green tops (hulls) using a paring knife or your fingers. Cut the strawberries into quarters to make blending easier.
2. Kiwis: Peel the kiwis with a vegetable peeler or knife, then slice them into smaller chunks. This will help achieve a smooth consistency in your pops.
Preparation is crucial because it directly affects both the flavor and texture of your pops. Make sure to choose fruits that are at their peak ripeness to ensure a vibrant and sweet taste.
Blending the Base
Now that your fruits are prepped, it’s time to blend!
1. Strawberry Base: In a blender, combine the prepared strawberries with a splash of lemon juice and honey (or your preferred sweetener). Blend on high until the mixture is completely smooth. If the mixture is too thick, add a little water or more lemon juice to reach your desired consistency.
2. Kiwi Base: Repeat the process with the kiwi chunks. Blend them in the same way, adjusting sweetness to your preference. If the kiwis are particularly tart, you may want to add a touch more honey.
Troubleshooting Common Issues: If your mixture isn’t blending well, check the following:
– Ensure your blender is powerful enough for the task.
– Add small amounts of liquid to help with blending.
– Blend in batches if necessary, especially if you have a smaller blender.
Taste Testing
One of the joys of making homemade popsicles is the ability to customize flavors. Before you pour the mixtures into molds, take a moment to taste each base.
– Adjusting Sweetness: If the strawberry blend is too sweet, you can balance it with more lemon juice. Conversely, if it’s not sweet enough, add another drizzle of honey or your sweetener of choice.
– Kiwi Adjustments: The kiwi base may require more sweetness or acidity adjustment. Remember, the flavors will mellow slightly when frozen, so aim for a slightly stronger taste than you desire.
Layering the Pops
Layering your pops not only enhances their visual appeal but also creates a delightful blend of flavors.
1. First Layer: Start by pouring the strawberry mixture into your popsicle molds, filling them about halfway.
2. Swirl Technique: Instead of simply pouring the kiwi mixture on top, use a skewer or toothpick to gently swirl the two mixtures together. This creates a beautiful marbled effect.
3. Final Layer: Add more strawberry mixture to fill each mold, leaving a little space at the top for expansion as the pops freeze.
This layering technique not only looks stunning but also allows for a combination of flavors in every bite.
Inserting Sticks and Freezing
To achieve perfectly formed pops, proper stick placement is essential.
1. Stick Placement: Insert your popsicle sticks into the center of each mold. If the mixture is too soft, wait about 30-45 minutes after pouring the last layer before inserting the sticks. This ensures they stay upright during freezing.
2. Freezing Duration: Freeze the popsicles for at least 4-6 hours, or until they are completely solid. For best results, leave them overnight if you can.
Removing the Pops
Once the pops are frozen solid, it’s time to enjoy them!
1. Easy Removal: To remove the pops from the molds without damaging them, run warm water over the outside of the molds for a few seconds. This slight warmth will help loosen the pops without melting them.
2. Gentle Pulling: Carefully pull the pops out of the molds. If a pop sticks, gently twist it to help release it.
Serving Suggestions
Now that your Frosty Strawberry Kiwi Bliss Pops are ready, it’s time to serve them!
1. Presentation: Consider serving the pops on a decorative platter or in a glass. You can also add a sprig of mint or a slice of fresh kiwi on top for an elegant touch.
2. Garnishes: For an extra touch, drizzle a bit of honey or yogurt over the top, or serve with a side of whipped cream for dipping.
3. Pairing Ideas: These pops pair beautifully with fresh fruit salads, yogurt, or even a light summer dessert spread.
Nutritional Information
These Frosty Strawberry Kiwi Bliss Pops are not only delicious but also nutritious. Here’s a breakdown of the nutritional benefits per serving:
– Calories: Approximately 50-60 calories per pop.
– Macronutrient Breakdown:
– Carbohydrates: 14g
– Protein: 1g
– Fat: 0g
– Vitamins and Minerals: Rich in vitamin C, fiber, and antioxidants, thanks to the fresh fruits.
These pops are gluten-free and vegetarian, making them a perfect treat for various dietary lifestyles. They provide a guilt-free option to satisfy your sweet tooth while enjoying the health benefits of real fruit.
Variations and Customizations
Encourage creativity by experimenting with different flavors and ingredients:
1. Fruit Combinations: Instead of just strawberries and kiwis, try using a mix of other fruits like mango, pineapple, or mixed berries for a tropical twist.
2. Flavored Yogurt: Incorporate flavored yogurt, such as coconut or honey, into your pops for added creaminess and flavor depth.
3. Additional Ingredients: Add chia seeds for an extra boost of fiber, or protein powder to make your pops a post-workout treat.
Feel free to get creative and adjust these ingredients based on your taste preferences!
Conclusion
Making Frosty Strawberry Kiwi Bliss Pops is a delightful way to celebrate summer flavors while enjoying a healthy treat. The process is easy and fun, making it an ideal activity for families or gatherings with friends. The satisfaction of enjoying a refreshing, guilt-free dessert that showcases the vibrant tastes of fresh fruits is unparalleled.
So gather your ingredients, get the kids involved, and enjoy the creativity of crafting your own popsicles. Not only will you relish in the joy of making something from scratch, but you’ll also create lasting memories while indulging in a delicious, nutritious treat that can be enjoyed all summer long. Embrace the bliss of these homemade pops and share them with loved ones for the ultimate summer experience!


