Go Back
Banana pudding has long been a favorite comfort dessert, evoking memories of family gatherings, picnics, and summer barbecues. Its creamy texture, sweet banana flavor, and the satisfying crunch of vanilla wafers make it a beloved choice for many. However, as with all classic dishes, there is always room for innovation. Enter the "Banana Bliss Pudding Delight" — a delectable twist on the traditional recipe that elevates the humble banana pudding to new heights. This delightful dessert combines the familiar flavors we know and love while introducing a few modern elements that enhance its appeal.

Banana Pudding with Vanilla Wafers

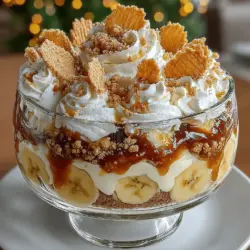
Discover the deliciousness of Banana Bliss Pudding Delight, a modern twist on the classic banana pudding. This easy-to-make dessert features creamy custard, ripe bananas, and crunchy vanilla wafers, capturing the comfort of family gatherings and summer picnics. Perfect for any occasion, from casual get-togethers to special celebrations, you'll impress your guests with its delightful flavors and beautiful presentation. Treat yourself to this sweet indulgence today!

Ingredients
  

4 ripe bananas, sliced

1 box (12 oz) vanilla wafers

1 cup granulated sugar

1/2 cup all-purpose flour

1/4 teaspoon salt

4 cups whole milk

4 large egg yolks

2 teaspoons pure vanilla extract

1 tablespoon unsalted butter

Whipped cream (for topping)

Extra vanilla wafers and banana slices (for garnish)

Instructions
 

Prepare the Baking Dish: In a 9x13 inch dish, arrange half of the vanilla wafers evenly across the bottom to create the base layer. Set this aside while you prepare the custard.

    Make the Custard Base: In a medium saucepan, combine the granulated sugar, flour, and salt. Whisk these dry ingredients together to ensure they are evenly mixed. Gradually pour in the whole milk while whisking continuously to prevent any lumps from forming.

      Cook the Custard: Place the saucepan over medium heat and cook the mixture, stirring constantly with a wooden spoon or whisk. Keep a close eye on it as it heats—this process should take about 10-15 minutes. You'll know it’s ready when the mixture begins to simmer and thickens to a pudding-like consistency. Once thickened, promptly remove the saucepan from the heat.

        Tempering the Eggs: In a medium mixing bowl, lightly beat the egg yolks until they are smooth. To temper the yolks, slowly ladle in about a cup of the hot milk mixture, whisking constantly. This gradual process helps prevent the yolks from scrambling when combined with the heat.

          Combine the Mixtures: Pour the tempered egg yolk mixture back into the saucepan containing the remaining milk mixture. Place the saucepan back on the stovetop over low heat, and stir gently for an additional 2-3 minutes, allowing it to thicken even more while ensuring it does not stick to the bottom of the pan.

            Finish the Custard: Take the saucepan off the heat one last time. Stir in the pure vanilla extract and the unsalted butter until both are fully melted and incorporated into the custard.

              Assemble the Pudding: Carefully pour half of the custard over the layer of vanilla wafers in the dish, smoothing it out with a spatula. Next, layer half of the sliced bananas evenly over the custard. Follow this with another layer of vanilla wafers, then pour over the remaining custard. Finally, top with the rest of the banana slices to finish layering.

                Chill and Serve: Cover the assembled pudding with plastic wrap, ensuring it is tightly sealed to prevent any odors from the refrigerator mixing in. Place the dish in the refrigerator to chill for a minimum of 4 hours, or preferably overnight, allowing the flavors to meld beautifully. Before serving, add a generous dollop of whipped cream on top and garnish with extra vanilla wafers and banana slices for a delightful finish.

                  Prep Time, Total Time, Servings: 30 minutes | 4 hours (chill) | 8 servings

                    - Presentation Tips: For an elegant touch, serve individual portions of the pudding in glass dessert cups, allowing the layers to be beautifully visible. Add a sprig of mint as decoration for a pop of color!